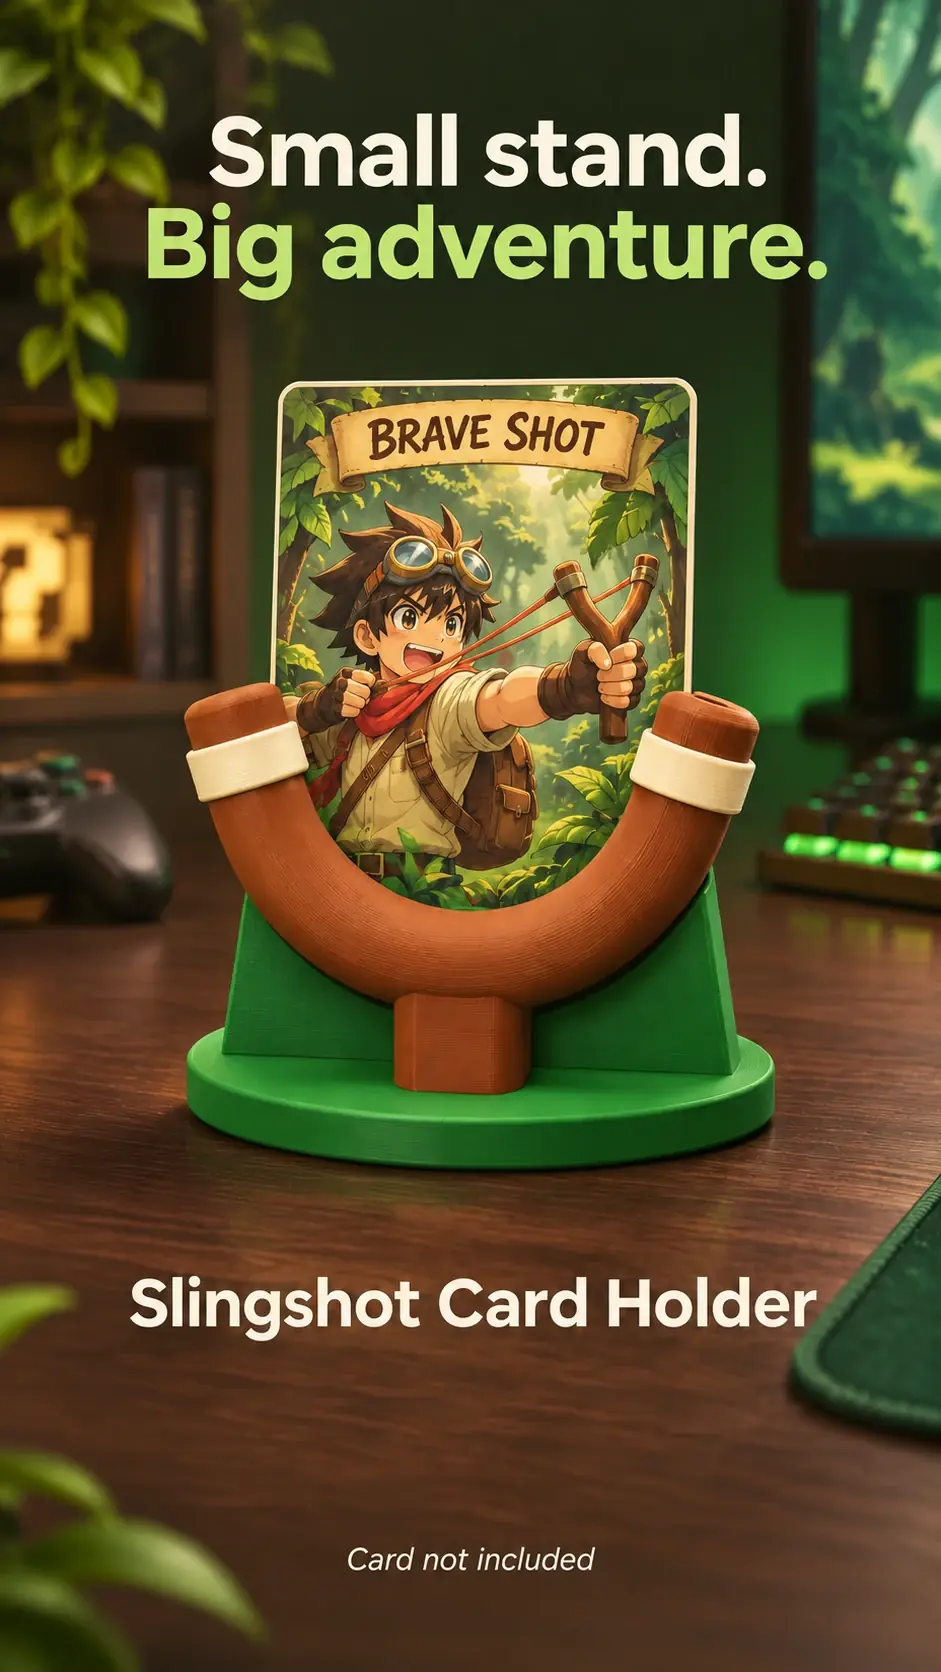
How to display trading cards at home: a collector’s first setup
If your favourite card is still tucked away because you’re worried about fit, glare or clutter, start with these practical checks before you choose a display spot.
Read the guideTHE COLLECTOR’S DESK
Straightforward ideas for displaying the cards you love, choosing a holder and making a little room for your collection.
PRACTICAL NOTES FOR COLLECTORS
1000 new guides have been added. Search by question or browse the library by topic.
If your favourite card is still tucked away because you’re worried about fit, glare or clutter, start with these practical checks before you choose a display spot.
Read the guideGUIDE LIBRARY
Search the full library or open a topic for focused notes on display planning, card fit, care and choosing a design.
1120 guides in 26 topics
Choose a display spot that is easier on your trading cards: reduce direct sun, manage reflections and keep the setup away from heat and damp.
Measure the full outside dimensions of a protected trading card before choosing a display holder, including the enclosure’s width, height and thickness.
Plan a tidy trading card display shelf with a clear focal card, stable surface, useful spacing and room to add another favourite later.
Use colour, contrast and nearby decor to choose a trading card holder that complements the artwork without overwhelming the card.
Choose a card holder shape that complements the artwork by considering its silhouette, theme and visual weight without letting the holder overpower the card.
Keep a trading card display fresh with a simple rotation routine that makes changing cards easy and reduces unnecessary handling.
Use a clean, soft cloth on the holder and surrounding shelf, and keep abrasive cleaners and cloths away from cards, sleeves and clear cases.
Keep a trading card display tidy with a light, repeatable cleaning routine that protects the card and avoids unnecessary handling.
Before returning a card display to its shelf, confirm the card is seated, the surface is dry and the holder rests securely.
Rotate displayed cards by preparing a clean staging area, handling the card by its enclosure and checking the new card’s fit before placement.
After rotating a card out of a display, return it to a clean sleeve or case and a stable storage location suited to its enclosure.
Choose a place for displayed cards that avoids direct sunlight and strong heat, which can fade artwork or affect protective materials over time.
Place a card display in a dry, ventilated part of the room rather than near sinks, humidifiers, bathrooms or other sources of moisture.
Give a card display a dedicated spot outside the reach of drinks, food and plants that might spill, drip or leave residue.
Reduce dust around a displayed card by keeping the nearby shelf uncluttered, cleaning the room gently and avoiding airflow that carries lint toward the holder.
Check that a card holder remains stable after moving nearby objects, cleaning the shelf or changing the card it supports.
Move a card holder with care by clearing the route, securing the card as intended and keeping the holder level during the transfer.
Keep fingerprints off card artwork by handling its sleeve or case edges and avoiding pressure on the face during placement and routine viewing.
Avoid bending a trading card during a display change by supporting the enclosure, using the intended slot and stopping if anything resists.
A card can be left exposed while a holder is being moved or cleaned. Prepare a clean staging area and a safe enclosure before removing the card.
Repeatedly touching the card face can leave oils or marks. Use clean, dry hands and hold the sleeve or case by its sides.
Dusty surroundings may encourage frequent handling of the card. Keep the shelf uncluttered and clean nearby surfaces before wiping the holder.
Spray cleaner can drift onto the card, sleeve or holder surfaces. Apply suitable cleaner to a cloth away from the display, following product care directions.
An obstructed route or loose grip can cause a holder to tip during a move. Clear both locations and hold the holder by its stable base or intended grip area.
A shelf can shift slightly after cleaning, furniture movement or an accidental bump. Check that the base remains level and the card still sits in its intended position.
Heat sources and direct warm airflow may affect cards and protective materials. Choose a spot away from radiators, direct sun and device exhaust.
Bathrooms, sinks and damp cabinets can expose paper and sleeves to moisture. Choose a dry location with ordinary room airflow and no risk of splash or condensation.
A cup near the holder can spill or be knocked over during normal use. Put drinks on another surface and leave a clear buffer around the display.
A holder may be nudged when nearby surfaces are wiped. After cleaning, set the base back on a level area away from the shelf edge.
A removed card can be misplaced or exposed if storage is chosen after the swap. Prepare a clean protective enclosure and labelled storage place before removing it.
A special or valuable card may call for more conservative handling and exposure choices. Consider whether the card is better stored safely and display a less sensitive copy or a different favourite.
Window light changes throughout the day and may create direct sun or reflections. Observe the spot at different times and choose indirect light away from the sunbeam.
Transport can cause holders and cards to shift if not packed separately. Follow suitable packing guidance for the card enclosure and holder; keep the card protected from pressure.
A familiar arrangement may not suit a new shelf or light source. Measure the new surface and examine sunlight, heat, airflow and access.
Sun angle, room heating and humidity can change over the year. Revisit the display location as daylight and room conditions change.
Irregular cleaning can lead to unnecessary card handling or accumulated dust. Choose a light schedule based on the room and clean the shelf around the card.
A new room changes light, humidity, airflow and traffic patterns. Observe the new spot through the day and keep the display away from direct exposure.
Direct airflow can carry dust or warm air toward a display. Check the vent direction when heating or cooling is running.
Door closures, speakers or desk movement can make a shelf vibrate. Observe the holder during ordinary room activity and choose a steadier surface if needed.
A door or cabinet can strike a holder even when the shelf seems out of the way. Open doors fully and mark their movement path before choosing the display spot.
A holder can remain standing while its card or base shifts. Inspect the base, card angle and support contact without pressing on the artwork.
A commemorative card can carry personal meaning and may be handled less often. Consider safe storage as well as display and choose a location with limited exposure.
Different holder and protector materials may need different cleaning methods. Use care instructions from the product maker and avoid experimenting with solvents.
Tape or sticky pads can leave residue or affect a holder’s surface. Use a freestanding, stable placement unless the seller recommends a specific mounting method.
A display may be safer in storage when the room is exposed to light, heat or activity. Compare the shelf environment with the card’s care needs and choose a stable cabinet or box if appropriate.
Quick swaps can lead to drops, scratches or confusion about where a card belongs. Prepare the new card, clean staging area and storage place before starting.
A clear or glossy protector reflects windows and lamps. Shift the display or room light slightly and inspect the card face again.
Light and room activity vary over the day. Review the spot in morning, afternoon and evening conditions.
A holder may slide or tip in a bag during transport. Follow the seller’s packing guidance and keep the card separately protected if needed.
A loose card can contact a holder or other objects during packing. Use a suitable enclosure and keep the card from pressing against holder features.
A delivered holder or card may have moved during transit. Inspect the product and card enclosure before setting them up.
Changes may go unnoticed if a card is handled or moved often. Use dated photographs under consistent light and note the enclosure and location.
Heaters can create direct warmth and dry airflow. Choose a shelf well away from the heater and inspect the spot when it is on.
A humidifier can release moisture into nearby shelves. Place the display outside the mist path and follow device placement guidance.
Cooking creates heat, steam and airborne residue. Choose a room away from cooking surfaces and avoid open kitchen shelves.
Window sills may receive direct sun, condensation and temperature changes. Check conditions throughout the day and avoid direct exposure or dampness.
A fan can move dust and light objects. Place the holder outside direct airflow and observe it while the fan runs.
Air conditioning can create direct airflow and temperature changes. Check the vent direction and choose a position outside the direct stream.
Radiators expose nearby shelves to heat. Choose another wall or shelf with more distance from the heating source.
Fireplaces can create heat, smoke and airborne residue. Keep cards outside the fireplace area and choose a cooler, cleaner room.
Bathroom humidity and steam can affect paper and sleeves. Choose a room away from showers, sinks and condensation.
A bottle can leak or tip when the table is bumped. Store water on a separate surface and keep the cap closed.
Vases can spill and flowers may shed water or debris. Place flowers on another surface with a separate tray.
Watering and falling leaves can bring moisture or dirt to a shelf. Keep plants and watering tools on another surface.
Open flames, wax and heat are not suitable beside paper cards. Place the card display in a separate area away from candles.
Food can leave crumbs, grease or liquid near a card. Use a separate dining surface and wash hands before handling any sleeve.
Open windows can bring dust, moisture and direct sunlight. Observe the airflow and light at different times and close the window when weather is unsuitable.
Bright rooms may receive direct sun and reflective glare. Choose a shaded location with indirect room light.
Basements can have variable moisture and airflow. Check the room for dampness and choose a dry shelf away from exterior walls if needed.
Attics can have temperature swings and direct roof sunlight. Choose a shaded, climate-stable area and monitor conditions over time.
Storage rooms can have dust, temperature changes and stacked boxes. Use a clean shelf with clear space above and around the holder.
A room may feel comfortable but still have localized light or airflow issues. Choose a shelf away from windows, vents and heat sources.
Large windows can expose shelves to strong changing light. Choose an interior wall or shaded shelf away from direct beams.
Bright lamps can create glare and warmth. Angle the lamp away from the protector and keep a safe distance.
Window reflections can obscure artwork at certain times. Shift the viewing angle or use a different wall that does not reflect the window.
A nearby screen can reflect in a glossy card protector. Turn the display slightly or adjust screen brightness and room lighting.
Ceiling fixtures may reflect as bright spots on card surfaces. Move the light source, use diffuse lighting or shift the viewing position.
Natural light changes direction and intensity. Prefer indirect daylight and monitor the display throughout the day.
A shade may reduce glare but may not fully prevent direct sunlight. Observe the display with the shade open and closed at different times.
Routine care is easier to forget when it has no clear sequence. List light, dust, stability and moisture checks appropriate to the room.
A setup can drift from its intended position after months of everyday use. Check visibility, stability, light, dust, enclosure and nearby activity.
Small problems can go unnoticed when the display is only viewed from one angle. Inspect the front, side and base and check the surrounding shelf.
A photo can show a home interior or personal details unintentionally. Review the background and remove identifying information before sharing.
A customer image should not be reused publicly without permission. Ask the owner what use they allow and record the response.
Storage conditions vary by room and protective case. Explain the general goal of avoiding pressure, moisture and direct exposure.
A cleaning method safe for one material may damage another. Use the product maker’s care instructions and soft clean tools.
Protecting a Card While Changing Holders when displaying a set: the group’s order, visual theme and amount of space available. choose a subset or sequence that leaves gaps and preserves each card’s visibility.
Keeping Fingerprints Off Card Artwork during a card rotation: a clean staging area, the replacement card and safe storage for the current one. prepare both cards before starting and complete one careful change at a time.
Reducing Dust on a Card Display in a shared room: other people’s movement, shared surfaces and the chance of accidental contact. choose a stable defined area away from food, bags, doors and high-use surfaces.
Cleaning a Card Holder Without Spraying It when photographing the setup: camera level, light reflection, full holder visibility and sample-card context. capture a level front view plus a side view and use soft indirect light.
Moving a Card Display Safely when preparing a custom request: exact measurements, card orientation, support visibility and style preferences. separate must-have fit requirements from optional colour or decoration requests.
Checking a Holder After a Shelf Moves during a final setup review: card seating, visible artwork, holder stability and the surrounding environment. check front, side and base, then review light, dust, moisture and nearby activity.
Keeping a Card Display Away from Heat before choosing a location: the available shelf, everyday traffic and viewing angle. measure the usable surface first, then allow room around the holder for safe access.
Keeping a Card Display Away from Moisture when space is limited: the smallest clear area that still keeps the card visible and reachable. prioritize one focal card and rotate the rest instead of packing holders tightly together.
Keeping Drinks Away from a Card Display before ordering a holder: the exact enclosure, selected design and published product information. compare the full outside dimensions with the stated slot and read the inclusion notes.
Checking Holder Stability After Cleaning after changing a sleeve or case: the new enclosure’s width, height, thickness and edge shape. measure the complete protected card rather than assuming the old fit still applies.
Storing a Card After Display when displaying a set: the group’s order, visual theme and amount of space available. choose a subset or sequence that leaves gaps and preserves each card’s visibility.
Planning a Display for a Special Card when photographing the setup: camera level, light reflection, full holder visibility and sample-card context. capture a level front view plus a side view and use soft indirect light.
Displaying a Card Near a Window before ordering a holder: the exact enclosure, selected design and published product information. compare the full outside dimensions with the stated slot and read the inclusion notes.
Preparing a Card Display for a Move before choosing a location: the available shelf, everyday traffic and viewing angle. measure the usable surface first, then allow room around the holder for safe access.
Rebuilding a Card Display After Moving when space is limited: the smallest clear area that still keeps the card visible and reachable. prioritize one focal card and rotate the rest instead of packing holders tightly together.
Reviewing a Card Display Each Season before ordering a holder: the exact enclosure, selected design and published product information. compare the full outside dimensions with the stated slot and read the inclusion notes.
Making a Card Display Cleaning Plan after changing a sleeve or case: the new enclosure’s width, height, thickness and edge shape. measure the complete protected card rather than assuming the old fit still applies.
Checking a Display After Changing Rooms when displaying a set: the group’s order, visual theme and amount of space available. choose a subset or sequence that leaves gaps and preserves each card’s visibility.
Keeping a Card Display Away from Air Vents during a card rotation: a clean staging area, the replacement card and safe storage for the current one. prepare both cards before starting and complete one careful change at a time.
Protecting a Display from Shelf Vibration in a shared room: other people’s movement, shared surfaces and the chance of accidental contact. choose a stable defined area away from food, bags, doors and high-use surfaces.
Keeping a Card Display Away from Door Swings when photographing the setup: camera level, light reflection, full holder visibility and sample-card context. capture a level front view plus a side view and use soft indirect light.
Checking a Card Display After a Bump when preparing a custom request: exact measurements, card orientation, support visibility and style preferences. separate must-have fit requirements from optional colour or decoration requests.
Choosing a Display for a Commemorative Card before choosing a location: the available shelf, everyday traffic and viewing angle. measure the usable surface first, then allow room around the holder for safe access.
Reviewing Material Care for a Display when displaying a set: the group’s order, visual theme and amount of space available. choose a subset or sequence that leaves gaps and preserves each card’s visibility.
Avoiding Adhesives Near a Card Display during a card rotation: a clean staging area, the replacement card and safe storage for the current one. prepare both cards before starting and complete one careful change at a time.
Choosing a Storage Location for Displayed Cards in a shared room: other people’s movement, shared surfaces and the chance of accidental contact. choose a stable defined area away from food, bags, doors and high-use surfaces.
Rotating a Display Without Rushing when photographing the setup: camera level, light reflection, full holder visibility and sample-card context. capture a level front view plus a side view and use soft indirect light.
Reducing Reflections on Card Protectors before ordering a holder: the exact enclosure, selected design and published product information. compare the full outside dimensions with the stated slot and read the inclusion notes.
Checking a Card Display at Different Times after changing a sleeve or case: the new enclosure’s width, height, thickness and edge shape. measure the complete protected card rather than assuming the old fit still applies.
Make room for a favourite trading card on a compact desk with smart placement, a clear work zone and a small, stable display footprint.
Plan a dorm-room card display around limited surfaces, shared living space and easy packing, using a stable spot that does not need permanent installation.
Display cards in a rental without wall mounting by using a stable shelf, desk or bookcase and checking the lease before adding any fixtures.
Take clearer photos of a trading card display with soft light, a simple background and a viewing angle that reduces reflections.
Keep a 3D-printed card holder presentable with gentle dusting, careful placement and material-aware cleaning that avoids heat and harsh chemicals.
Choose a thoughtful trading card display gift by checking the recipient’s card enclosure, preferred style, available space and what the listing includes.
Plan a trading card display gift by confirming the recipient’s card size, preferred style and practical space before choosing a holder.
A gift holder may not suit the recipient’s card case or available shelf space. Check the intended enclosure dimensions and ask about the recipient’s display location.
Collectors may use different sleeves and cases even for cards of the same size. Find out what enclosure the recipient uses and compare it with the holder details.
A gift note can be more meaningful when it connects to the card or shared memory. Keep the message concise and use the recipient’s preferred name and occasion.
A gift may not fit the recipient’s card protector or room. Ask about dimensions and intended placement without revealing more than needed.
Long gift wording can be difficult to read on a small item or note. Choose a brief personal phrase and proofread it before submitting.
A deadline may matter when selecting a made-to-order product. Review the current product and shipping information without assuming a delivery date.
Seasonal decorations may be placed close to the holder. Choose lightweight accents that stay separate from the card and do not introduce heat or moisture.
A new collector may not yet know which protector they will use. Choose a flexible design only after checking its stated opening dimensions and use.
A gift should reflect the couple’s card interests and available space. Choose a theme they both value and confirm the card enclosure and room setting.
A graduation gift may move with the recipient to a new room or home. Choose a compact design that suits a shelf or desk and verify the card fit.
A new home may have different shelves, lighting and room colours. Choose a display that works on a tabletop and ask about the recipient’s card setup.
A thank-you gift is stronger when it reflects the recipient rather than a generic theme. Connect the design to a shared memory or card interest and keep the scale practical.
Experienced collectors may use specific protectors and have established display preferences. Ask about the exact enclosure and desired view without guessing.
A child’s display area may be near play, food or active movement. Choose a stable, accessible location with adult guidance and keep cards protected.
The recipient may not yet know where the display will go. Choose a compact design and include its overall dimensions in the gift note.
A friend’s collection may include cards from several formats and protectors. Ask which card they would display and measure that specific enclosure.
Multiple gift items can crowd a shelf or obscure the card holder. Choose related items that leave the card visible and the holder base unobstructed.
Gift examples may omit the recipient’s specific card case. Show what information to confirm before choosing a holder.
Preparing a Card Holder Gift Order when space is limited: the smallest clear area that still keeps the card visible and reachable. prioritize one focal card and rotate the rest instead of packing holders tightly together.
Choosing a Holder for a Collector Gift before ordering a holder: the exact enclosure, selected design and published product information. compare the full outside dimensions with the stated slot and read the inclusion notes.
Writing a Gift Note for a Card Display after changing a sleeve or case: the new enclosure’s width, height, thickness and edge shape. measure the complete protected card rather than assuming the old fit still applies.
Choosing a Display for a Gift Recipient during a card rotation: a clean staging area, the replacement card and safe storage for the current one. prepare both cards before starting and complete one careful change at a time.
Writing a Short Holder Gift Message in a shared room: other people’s movement, shared surfaces and the chance of accidental contact. choose a stable defined area away from food, bags, doors and high-use surfaces.
Planning a Card Display Gift for a Birthday when photographing the setup: camera level, light reflection, full holder visibility and sample-card context. capture a level front view plus a side view and use soft indirect light.
Planning a Seasonal Card Display Gift when preparing a custom request: exact measurements, card orientation, support visibility and style preferences. separate must-have fit requirements from optional colour or decoration requests.
Gifting a Card Holder to a New Collector during a final setup review: card seating, visible artwork, holder stability and the surrounding environment. check front, side and base, then review light, dust, moisture and nearby activity.
Compare an open trading card stand with an enclosed display case by considering visibility, dust, access, the card’s current protection and available space.
Arrange several trading cards so each one can be seen: choose a focal card, balance heights and colours, and leave clear space between holders.
Plan a display for a graded trading card by checking the slab’s outer dimensions, keeping it in its case and choosing a stable viewing spot.
Display oversized and promotional trading cards by measuring the full card, checking its thickness and confirming the holder is made for that format.
Check sleeve clearance by measuring the sleeved card’s outside width and height, including the sleeve opening and any extra lip that enters the slot.
Before displaying a double-sleeved card, measure the complete two-sleeve setup and confirm the holder accepts its outer thickness and dimensions.
Display a card in its top loader only when the holder is confirmed for that case’s outer dimensions; keep the card inside its usual protection.
Plan a display for a magnetic card case by checking its complete outer dimensions, weight and how the holder supports the case.
Fit an acrylic card case to a display by measuring the case itself, checking its edge shape and confirming that the holder will not press on the panels.
Display an irregularly shaped card only in a holder designed for its outline, using the widest measurements and confirming that no edge will catch.
Measure a vintage card in its current enclosure before choosing a display, since age, storage sleeves and protective cases can create different outside dimensions.
Display a promotional card by checking its full size, surface condition and sleeve dimensions rather than assuming it matches the regular cards in its set.
Choose a holder for a landscape card by confirming that its supported orientation is horizontal and that the card remains stable and visible in that position.
Display mini trading cards in a holder made for their smaller dimensions, checking that the slot prevents slipping without squeezing the card.
Check the thickness of a relic or patch card and its enclosure before display, since a thicker card can need a different holder slot.
Display a foil card by testing the viewing angle and light direction, since reflective surfaces can hide artwork when a bright source faces the card.
Fit a rounded-corner card by checking the full width, height and corner clearance so its edges are supported without catching on the slot.
Before displaying a card in a penny sleeve, measure the sleeve’s outside dimensions and check how its open edge sits in the holder.
Check fit for a card in a thick sleeve by measuring the entire protected setup and comparing it with the holder’s supported thickness and slot width.
Compare the outside dimensions of two card enclosures before choosing a holder, then select a display that supports the exact one you intend to show.
Check slot depth as well as width and height so the card rests at the intended angle and does not sit too shallow or too far into the holder.
Recheck card fit whenever you change sleeve type or protective case, because the new enclosure may change the card’s width, height or thickness.
Prepare for a card-fit measurement by clearing a clean surface, gathering the exact enclosure and writing down dimensions without bending or pressing the card.
Sleeves can change the outside dimensions that a card holder must accommodate. Select the exact sleeve or case you intend to use, then measure its outside width, height and thickness.
Two layers of protection may create a thicker profile than a single sleeve. Measure the complete double-sleeved setup rather than estimating from a bare card.
A raised rim can be wider than the main face of a protective case. Measure the outermost points, including corners, lips and latch features.
Unusual card shapes may sit differently in a holder designed around straight edges. Note the card’s maximum width and height and the shape of the protected enclosure.
Rigid protectors can be substantially thicker than soft sleeves. Measure the full exterior at its widest and thickest points using a ruler or caliper carefully.
Top loaders have a stiff outer profile that may not match a bare-card slot. Record the outside dimensions of the loaded top loader, including its lip.
Two cases sold for the same card size may have different exterior dimensions. Measure each case separately and label the notes so results are not confused.
A new sleeve brand or style can alter the card’s exterior dimensions. Measure the replacement sleeve and compare it with the old verified setup.
A landscape card may not sit securely in an opening intended for portrait orientation. Check whether the holder’s listing supports both orientations and where its supports contact the card.
Smaller cards may sit too low or shift in a holder designed for standard dimensions. Measure the card or its protector and check the holder’s minimum supported size.
Measurements are unreliable when the wrong enclosure or units are recorded. Use a clean surface, place the card in its intended sleeve and measure exterior width, height and thickness.
Overall holder width does not reveal how wide its card slot is. Find the slot measurement or ask the maker to confirm the opening width.
Slot depth affects how far the card sits and which parts remain visible. Look for depth details in the listing or side view, then compare them with the enclosure.
The insertion direction can affect card access and orientation. Inspect the product diagrams and side view to identify the opening and support surfaces.
A support rail may cross an area of artwork important to the collector. Inspect where the card touches the holder from front and side views.
Protectors vary in thickness and outer shape. Measure the outside of the exact protector and compare it with the slot dimensions.
General card-size advice may not cover sleeves or rigid cases. Name the exact enclosure being measured and distinguish its outside size from the card’s dimensions.
A protector’s brand name alone may not describe its exact outer size. Measure its exterior and note features such as lips, corners or magnetic edges.
Oversized cards may not match standard holder openings. Measure the card enclosure and ask whether the product supports that format.
Thick cards or memorabilia cards can exceed a standard slot’s depth. Measure the full thickness of the protected card and check the holder’s depth specification.
A card can fit physically while facing the wrong direction. Compare the intended front view with the holder’s front, slot and decorative side.
A card that appears to float or tilt may not be resting on the intended support. Inspect the base contact and slot from front and side views without forcing the card.
Supports can obscure card details or interfere with a protective case. Identify each contact point and compare it with the enclosure’s edges.
A bare card may contact holder supports directly. Check the product information and consider whether direct contact is suitable for the card.
A soft sleeve may wrinkle or catch if a slot is too narrow. Measure the sleeve’s outside dimensions and insert it only in a compatible opening.
Rigid cases may have corner or latch details that affect fit. Measure the full exterior and identify any raised edges.
A protective finish may affect both reflections and appearance. Follow the protector maker’s information and measure the case exterior.
The slot may be hidden behind decorative parts in a product rendering. Find a cutaway or side view and note the opening dimensions.
A sample measurement can be copied even when the customer’s case differs. Show what object was measured and include units.
A fit example can be assumed to apply to a different protector. Name the exact enclosure and measurements used.
Choosing a Sleeve Before a Display Holder when space is limited: the smallest clear area that still keeps the card visible and reachable. prioritize one focal card and rotate the rest instead of packing holders tightly together.
Checking Dimensions for a Double-Sleeved Card before ordering a holder: the exact enclosure, selected design and published product information. compare the full outside dimensions with the stated slot and read the inclusion notes.
Checking Clearance Around a Card Case Rim after changing a sleeve or case: the new enclosure’s width, height, thickness and edge shape. measure the complete protected card rather than assuming the old fit still applies.
Displaying Cards with Rounded Corners when displaying a set: the group’s order, visual theme and amount of space available. choose a subset or sequence that leaves gaps and preserves each card’s visibility.
Measuring a Rigid Card Protector during a card rotation: a clean staging area, the replacement card and safe storage for the current one. prepare both cards before starting and complete one careful change at a time.
Checking a Holder Opening for a Top Loader in a shared room: other people’s movement, shared surfaces and the chance of accidental contact. choose a stable defined area away from food, bags, doors and high-use surfaces.
Comparing Card Cases by Outside Size when photographing the setup: camera level, light reflection, full holder visibility and sample-card context. capture a level front view plus a side view and use soft indirect light.
Checking Fit After Changing Sleeve Brands when preparing a custom request: exact measurements, card orientation, support visibility and style preferences. separate must-have fit requirements from optional colour or decoration requests.
Displaying a Landscape Card in a Portrait Holder during a final setup review: card seating, visible artwork, holder stability and the surrounding environment. check front, side and base, then review light, dust, moisture and nearby activity.
Displaying a Miniature Trading Card before choosing a location: the available shelf, everyday traffic and viewing angle. measure the usable surface first, then allow room around the holder for safe access.
Preparing a Card for Size Measurement when space is limited: the smallest clear area that still keeps the card visible and reachable. prioritize one focal card and rotate the rest instead of packing holders tightly together.
Checking Slot Width Before Ordering before ordering a holder: the exact enclosure, selected design and published product information. compare the full outside dimensions with the stated slot and read the inclusion notes.
Checking Slot Depth Before Ordering after changing a sleeve or case: the new enclosure’s width, height, thickness and edge shape. measure the complete protected card rather than assuming the old fit still applies.
Checking Card Holder Opening Direction when photographing the setup: camera level, light reflection, full holder visibility and sample-card context. capture a level front view plus a side view and use soft indirect light.
Reviewing Card Support Contact Points during a final setup review: card seating, visible artwork, holder stability and the surrounding environment. check front, side and base, then review light, dust, moisture and nearby activity.
Choosing a Holder for a Card Protector during a card rotation: a clean staging area, the replacement card and safe storage for the current one. prepare both cards before starting and complete one careful change at a time.
Making Card Fit Guidance Specific during a final setup review: card seating, visible artwork, holder stability and the surrounding environment. check front, side and base, then review light, dust, moisture and nearby activity.
Checking a Protector Before Ordering a Holder when space is limited: the smallest clear area that still keeps the card visible and reachable. prioritize one focal card and rotate the rest instead of packing holders tightly together.
Choosing a Holder for an Oversized Card before ordering a holder: the exact enclosure, selected design and published product information. compare the full outside dimensions with the stated slot and read the inclusion notes.
Choosing a Holder for a Thick Card after changing a sleeve or case: the new enclosure’s width, height, thickness and edge shape. measure the complete protected card rather than assuming the old fit still applies.
Checking Card Orientation in a Holder when displaying a set: the group’s order, visual theme and amount of space available. choose a subset or sequence that leaves gaps and preserves each card’s visibility.
Checking Card Seating in a Holder during a card rotation: a clean staging area, the replacement card and safe storage for the current one. prepare both cards before starting and complete one careful change at a time.
Checking Clearance Around Holder Supports in a shared room: other people’s movement, shared surfaces and the chance of accidental contact. choose a stable defined area away from food, bags, doors and high-use surfaces.
Displaying a Card Without a Protector when space is limited: the smallest clear area that still keeps the card visible and reachable. prioritize one focal card and rotate the rest instead of packing holders tightly together.
Displaying a Card in a Soft Sleeve before ordering a holder: the exact enclosure, selected design and published product information. compare the full outside dimensions with the stated slot and read the inclusion notes.
Displaying a Card in a Rigid Case after changing a sleeve or case: the new enclosure’s width, height, thickness and edge shape. measure the complete protected card rather than assuming the old fit still applies.
Prepare a simple trading card display for a collectors’ event with a clear layout, stable placement and a plan for transporting cards separately.
Prepare a useful custom card holder request with card or protector dimensions, preferred display orientation, colour ideas and clear reference images.
Use a fit checklist for a custom card display: identify the enclosure, record three dimensions, state the intended orientation and confirm the holder before ordering.
Before requesting a custom holder, share the card enclosure dimensions, preferred orientation, design references and any must-keep artwork visibility requirements.
Prepare a custom holder order by writing down the desired design, size, colour, personalization and exact card enclosure before using the product options.
Keep custom text short and check its spelling, capitalization and line breaks in the product preview before adding a personalized holder to your basket.
A broad request can leave fit, orientation and appearance requirements unclear. Name the exact card enclosure, supply outside dimensions and describe the desired facing direction.
A front view can be misunderstood if the intended card-facing direction is not stated. Describe portrait or landscape orientation and which face should be visible from the front.
Holder supports may cover artwork details that matter to the collector. Identify the illustration areas or text that should remain unobstructed when describing a design.
Long text may be difficult to read on a small display surface. Prioritize a short name, date or phrase and proofread it before entering the product option.
A typo can be easy to miss when text is entered directly in a product configurator. Read the preview slowly and compare it with the exact text you intended to submit.
Text can disappear when its colour is too close to the holder background. Use the available preview to compare text and background contrast at the selected size.
Too many colours can distract from the card and make a design feel inconsistent. Choose one main colour and a small number of supporting accents tied to the card art.
Design details can be lost between an initial idea and a later order. Record the holder name, measurements, orientation, colour choices and approved text in one note.
A 3D preview can communicate appearance while leaving some physical details uncertain. Inspect the front, back and side and identify where the card and its supports meet.
Screen colour and printed material colour may not match exactly. Use the swatch name or code to record the selection, then review the assembled preview.
Colour swatches can look different on varied displays and under room lighting. Use the named or coded option to identify the choice and compare the preview.
A short message may omit the details needed to assess a fit. Include the listing, enclosure type, outside dimensions and preferred orientation.
A sample image may not match the card or sleeve a customer plans to display. Use an image that clearly shows orientation and artwork placement for visual review.
A sample card may face the wrong way even when the holder model is correctly oriented. Compare the card face with the holder’s intended front and rotate to inspect side relationships.
A screenshot may capture a temporary angle or hide a support. Reset to the default front view, inspect other angles and include the selected options.
A reference photo alone may not explain which details should be carried into a custom design. Point out the shape, colour, orientation or artwork visibility you care about.
A visually preferred design may need dimensions or structural support changes. List non-negotiable enclosure fit needs separately from optional colour and decoration.
An unclear measurement set can lead to assumptions about the card opening. Measure the protected card’s outside width, height and thickness and include the unit.
A custom design may be discussed across several messages or options. Compare the written confirmation with the intended card, size, text, colours and price.
A display may be visible to visitors, so some personal details may not belong on it. Choose a phrase that shares only what you want others to read.
A nickname, character name and personal name can be easy to confuse in a short option. Decide exactly which name should appear and preserve its preferred spelling.
Different date formats can be ambiguous across countries. Use a clear format such as a month written in words when space permits.
Text that looks large on a monitor may be small on the finished holder. Use the preview’s realistic scale or ask about the available text area.
Custom conversations may include several versions and adjustments. Record the final version, dimensions and written agreement in one place.
A revised preview may change the card support or exterior size. Compare each revision against the prior notes and identify changed elements.
Colour changes can alter how the card and supports contrast. Review all chosen colours together in the new preview.
Text edits can introduce a typo or change the line layout. Compare the new text character by character with the approved wording.
Changing a card case or holder opening can affect support and seating. Record the revised enclosure dimensions and compare them with the changed slot.
Rotating a model may also change its front-facing direction or card support. Inspect front, back and side views and identify which face is intended toward the viewer.
A camera or preview update can make a model appear changed when its geometry is not. Compare fixed front, side and back views using the same zoom and orientation.
A selected holder may change while other options remain on the page. Confirm the product title, image, size and price after switching designs.
A card photo without a scale reference may not show the protective case size. Photograph the exact enclosure beside a ruler and label the outside measurements.
A sample custom brief may be mistaken for an available standard option. Label it as an example and direct readers to confirm current feasibility.
A colour photo may vary across screens and materials. Identify the option label and say the image is illustrative if needed.
Writing a Clear Custom Holder Request when space is limited: the smallest clear area that still keeps the card visible and reachable. prioritize one focal card and rotate the rest instead of packing holders tightly together.
Specifying Card Orientation in a Custom Request before ordering a holder: the exact enclosure, selected design and published product information. compare the full outside dimensions with the stated slot and read the inclusion notes.
Planning Artwork Visibility Around Supports after changing a sleeve or case: the new enclosure’s width, height, thickness and edge shape. measure the complete protected card rather than assuming the old fit still applies.
Choosing Text for a Personalized Card Holder when displaying a set: the group’s order, visual theme and amount of space available. choose a subset or sequence that leaves gaps and preserves each card’s visibility.
Proofreading Personalization Before Checkout during a card rotation: a clean staging area, the replacement card and safe storage for the current one. prepare both cards before starting and complete one careful change at a time.
Choosing Contrast for Holder Personalization in a shared room: other people’s movement, shared surfaces and the chance of accidental contact. choose a stable defined area away from food, bags, doors and high-use surfaces.
Planning a Custom Holder Colour Palette when photographing the setup: camera level, light reflection, full holder visibility and sample-card context. capture a level front view plus a side view and use soft indirect light.
Saving Notes for a Custom Design when preparing a custom request: exact measurements, card orientation, support visibility and style preferences. separate must-have fit requirements from optional colour or decoration requests.
Reviewing a Custom Holder Preview during a final setup review: card seating, visible artwork, holder stability and the surrounding environment. check front, side and base, then review light, dust, moisture and nearby activity.
Comparing Swatches with a Product Preview before choosing a location: the available shelf, everyday traffic and viewing angle. measure the usable surface first, then allow room around the holder for safe access.
Comparing Display Colours Before Selecting after changing a sleeve or case: the new enclosure’s width, height, thickness and edge shape. measure the complete protected card rather than assuming the old fit still applies.
Asking for Card Fit Confirmation when preparing a custom request: exact measurements, card orientation, support visibility and style preferences. separate must-have fit requirements from optional colour or decoration requests.
Choose a simple background that helps a trading card and holder stand out, using contrast, texture and colour without hiding the display.
Pair a trading card with related memorabilia by keeping the objects separate, choosing one supporting item and ensuring the card remains easy to see.
Create a mini trading card gallery by selecting a small number of cards, using consistent spacing and placing the collection where people can pause to look.
Choose card holder colours by considering the room palette, card artwork and contrast needed to keep both the display and the card easy to see.
Make a card display easier to see from a distance by choosing a clear focal card, limiting nearby clutter and checking the viewing angle from common seats.
Arrange a card display in a video-call background by keeping it stable, visible in frame and free from glare or distracting movement.
Create a seasonal card display by selecting a small group that fits the season, keeping the holder away from moisture and changing decorations safely.
Strong colours can feel crowded when every holder and nearby object adds another accent. Pick one colour feature from the card and repeat it sparingly in the surrounding display.
Busy shelves can make a detailed card hard to read at a glance. Use a quieter wall or shelf area behind the card and keep nearby decoration restrained.
A viewer may not understand why cards belong together without context. Write a short theme label on a separate marker near the group, not on the card or holder.
A themed display can blend into a room or dominate it if its scale and colours are not considered. Compare the holder’s footprint and colours with the furniture around the intended spot.
Small objects can accumulate and compete with the displayed card. Keep only a few pieces that explain or complement the card’s theme.
A background that is too close to the card border can make the card disappear visually. Compare a few neutral surfaces and choose one that separates the card edges from the shelf.
A holder can compete with framed art when both share the same visual area. Choose whether the card is part of a gallery grouping or a separate focal point.
A display label can become too long to read or distract from the artwork. Use one short phrase that explains the connection among the cards.
A good front view from one seat may create glare from another. Check the card from common viewpoints and adjust its position or room light.
A flat row may not show hierarchy when cards have different visual weight. Use modest gaps and height differences only where every card remains visible.
Objects placed tightly together can make card artwork hard to notice. Leave empty space beside the holder and remove decorations that do not support the theme.
A bright or detailed card can dominate a group even when placed at the edge. Balance the strongest artwork with quieter cards or more open space.
A focal card can lose impact when surrounded by many competing objects. Give it a clear sightline and remove nearby clutter.
New decoration can crowd a card or obstruct access. Place accents around the holder and keep the card’s sightline clear.
Patterns behind the card can compete with fine illustration details. Choose a solid or low-contrast background and leave a little space around the holder.
A dark holder or background can blend into a dark shelf. Use a lighter accent or nearby indirect light to separate the card and base.
A light holder can disappear against a pale shelf. Use a subtle contrasting background or adjust the display position.
A quiet room can still have strong lamp glare and crowded bookcases. Choose a calm shelf that complements the room and keep card art visible from a seat.
A highly decorated holder can feel visually busy in a sparse room. Choose one feature display and preserve open space around it.
Bright wall and furniture colours can compete with card art. Choose a holder and background that provide a calm contrast.
A neutral room can make a card pop or cause a pale holder to blend in. Use card artwork or one small accent for colour while preserving space.
A small reading nook can become cluttered with books and lamps. Choose one shelf accent and preserve a clear view from the reading seat.
Controllers and game accessories can crowd a display. Use a separate shelf for collectibles and keep active equipment below or apart.
Studio lights and stands create strong reflections and bump risks. Use a dedicated shelf outside equipment paths and control the light angle.
A coloured lamp may alter the apparent card and holder colours. Use a neutral light for accurate viewing and photography.
Coloured lighting can tint artwork and obscure true card colours. Treat it as an accent rather than the only viewing light.
A spot can look clear from one angle and reflective from another. Check the card from normal seating and standing locations.
Uneven light can make part of the card face hard to read. Use diffuse room light and avoid a single bright point source.
Glossy backgrounds can add unwanted reflections. Try a matte backing or shelf surface that contrasts with the holder.
Strong texture can compete with detailed artwork. Choose a subtle texture and keep it behind rather than touching the holder.
Multiple background colours may create a busy composition. Use one or two broad blocks that complement the card palette.
A card and framed print may compete for the same focal position. Decide which is primary and use spacing or a shared colour to connect them.
Figures can block the card or crowd the holder base. Use one supporting figure placed beside or behind only if it does not obstruct the card.
Memorabilia may touch or overshadow the card. Choose one small object that explains the relationship and keep it physically separate.
Packaging can be larger than the card and dominate the shelf. Use a small box as context only when the card remains easy to see.
A display may feel stale even though the holder still suits the card. Change the card rotation, label or background while keeping the holder stable.
Lighting examples may not account for room variation. Describe the light direction and check the result at the reader’s viewing position.
Balancing the Colours in Card Artwork when space is limited: the smallest clear area that still keeps the card visible and reachable. prioritize one focal card and rotate the rest instead of packing holders tightly together.
Pairing a Holder with a Neutral Background during a card rotation: a clean staging area, the replacement card and safe storage for the current one. prepare both cards before starting and complete one careful change at a time.
Combining Cards with Small Collection Labels when photographing the setup: camera level, light reflection, full holder visibility and sample-card context. capture a level front view plus a side view and use soft indirect light.
Using a Card as a Room Accent when preparing a custom request: exact measurements, card orientation, support visibility and style preferences. separate must-have fit requirements from optional colour or decoration requests.
Avoiding Clutter Around a Card Display when preparing a custom request: exact measurements, card orientation, support visibility and style preferences. separate must-have fit requirements from optional colour or decoration requests.
Choosing a Background Colour for Card Artwork during a final setup review: card seating, visible artwork, holder stability and the surrounding environment. check front, side and base, then review light, dust, moisture and nearby activity.
Planning a Card Display Near Wall Art before choosing a location: the available shelf, everyday traffic and viewing angle. measure the usable surface first, then allow room around the holder for safe access.
Writing a Theme Label for a Card Display after changing a sleeve or case: the new enclosure’s width, height, thickness and edge shape. measure the complete protected card rather than assuming the old fit still applies.
Choosing a Viewing Angle for a Card Display before choosing a location: the available shelf, everyday traffic and viewing angle. measure the usable surface first, then allow room around the holder for safe access.
Creating Depth in a Card Display when space is limited: the smallest clear area that still keeps the card visible and reachable. prioritize one focal card and rotate the rest instead of packing holders tightly together.
Using Negative Space Around a Card Display when displaying a set: the group’s order, visual theme and amount of space available. choose a subset or sequence that leaves gaps and preserves each card’s visibility.
Arranging Cards by Visual Weight when photographing the setup: camera level, light reflection, full holder visibility and sample-card context. capture a level front view plus a side view and use soft indirect light.
Displaying One Card as a Focal Point when preparing a custom request: exact measurements, card orientation, support visibility and style preferences. separate must-have fit requirements from optional colour or decoration requests.
Reviewing a Display After Adding Decorations during a final setup review: card seating, visible artwork, holder stability and the surrounding environment. check front, side and base, then review light, dust, moisture and nearby activity.
Creating a Quiet Background for Card Art before choosing a location: the available shelf, everyday traffic and viewing angle. measure the usable surface first, then allow room around the holder for safe access.
Choosing a Card Display for a Dark Shelf in a shared room: other people’s movement, shared surfaces and the chance of accidental contact. choose a stable defined area away from food, bags, doors and high-use surfaces.
Choosing a Card Display for a Light Shelf when photographing the setup: camera level, light reflection, full holder visibility and sample-card context. capture a level front view plus a side view and use soft indirect light.
Find a practical place for a trading card display in a shared home by considering foot traffic, reachable surfaces, pets, children and everyday routines.
Set a card display near your usual eye level so the artwork is easy to view, while checking shelf stability, glare and room traffic before placing it.
Choose an upper or lower shelf by comparing visibility, reach, stability and nearby activity rather than assuming one height is best for every room.
Place a trading card display beside a monitor by keeping it outside ventilation paths, screen reflections and the space needed for keyboard and mouse movement.
Display trading cards inside a glass cabinet by checking shelf clearance, reflections, ventilation and access before placing holders behind the doors.
Add a trading card display to a reading nook by placing it within view but outside book, drink and lamp movement around the chair.
A hallway display should be placed on a stable surface outside the walking path, away from swinging doors and bags, and easy to view without stopping traffic.
Set up a bedroom card display where it can be enjoyed without placing it beside a hot lamp, open window, bedside drink or frequently moved item.
Display a trading card at work by choosing a compact, stable location, keeping shared surfaces clear and checking any workplace rules about personal items.
Add trading cards to a home library by balancing the display with book spines, keeping books upright and reserving a clear shelf section for the holders.
Place a card display near a game console only where it will not obstruct ventilation, be exposed to warm exhaust or interfere with controllers and cables.
Reduce vibration around a card display by moving it away from speakers, door impacts and frequently bumped furniture, then checking whether the surface stays steady.
Keep a card holder near a computer on a separate, stable surface away from vents, cables, liquids and areas where the device is frequently moved.
A holder can be easy to overlook when the card sits far above or below the usual sightline. Check the view from a chair and standing position before committing to a permanent shelf location.
A narrow, uneven or busy surface can make a display unstable or difficult to maintain. Choose a level area with enough clear space for the full holder base and routine cleaning.
Limited room can tempt collectors to squeeze a holder into a crowded shelf. Choose one visible spot and rotate featured cards instead of filling every open surface.
A desk area includes cables, devices, drinks and frequent movement. Use a separate shelf or a quiet desk corner outside the path of hands, cables and airflow.
Bedrooms can have changing sunlight, lamps and limited bedside surfaces. Look for a shaded shelf that is not beside a heater, window or drink surface.
Books can crowd a holder or fall against it when a shelf is tightly packed. Keep a separate bay for the display and leave access room beside book spines.
Console vents, controllers and cables can create heat, movement and snag risks. Place the holder beyond the console’s airflow and outside the area where controllers are stored.
Shared shelves may also serve as storage or drop zones for other people. Choose a clearly defined spot and keep the holder away from common surfaces used for food or bags.
Glass doors and shelves can add reflections or limit access to the holder. Position the card away from strong reflections and verify shelf clearance before placing it.
Books can crowd a holder or brush against its card when removed. Reserve a clear gap on the shelf and keep the holder outside the path of moving books.
A shelf light can create hot spots on glossy sleeves or card surfaces. Angle the light toward the display area instead of directly into the card face.
Desk organizers can block the card or bump it when items are retrieved. Place the holder outside the organizer’s working area and preserve a clear viewing angle.
A shared or changing room may have limited shelf space and active surfaces. Choose a stable shelf away from gaming equipment, drinks and doorways.
A small office may have limited surface area and reflective screens. Use a wall shelf or clear desk corner and check screen reflections from the chair.
The end of a shelf may expose a holder to bumps from people passing by. Move the display inward and leave a gap from the shelf edge and door path.
Entry surfaces collect bags, keys and other items. Select a side shelf outside the door swing and daily drop zone.
Strong directional light can hide card detail in reflections. Use indirect light and adjust the source rather than tilting an unstable holder.
A dark corner can make a card hard to see, while a bright lamp can create glare. Use soft ambient light near the display and avoid a direct beam on the card.
Daylight may create changing highlights and direct exposure. Choose a shaded location with indirect light and observe it during the brightest hours.
A mantel may be above heat, candles or a fireplace. Confirm the surface is not exposed to heat or soot and keep the card away from flame.
Pet movement, fur and water bowls can put a low display at risk. Choose a higher stable shelf outside reach and away from food or water.
Toys and active play can reach shelves unexpectedly. Move the display to a stable location outside play and throwing paths.
Student rooms often combine sleeping, study and storage in one space. Select a shelf away from the desk’s work area and bed edge.
Guests may set belongings on available surfaces. Choose a shelf outside the usual luggage and bedside drop zones.
A workspace may include tools, packages and frequent surface movement. Keep the display apart from packing or work materials.
Side tables often hold cups, remotes and other items. Reserve one clear area for the holder and move drinks to another surface.
Bedside tables are frequently used for lamps, drinks and personal items. Place the holder away from the bed edge and clear a separate spot for daily items.
Coffee tables are exposed to drinks, books and casual contact. Use a stable tray or shelf away from the table’s working area only if it keeps the holder secure.
Console tables may be near doors and drop zones. Choose a position away from keys, bags and door swings.
A monitor shelf may be close to heat, cable movement and a narrow ledge. Measure the shelf and check the device’s airflow direction.
Cabinets can limit airflow and create strong reflections. Check door clearance, light and shelf dimensions before placing the holder.
A desk corner may be crowded with equipment or exposed to bumps. Choose the corner furthest from routine movement and keep a safe edge margin.
Printers can vibrate, emit warm air and require frequent access. Place the holder on a separate surface outside the printer’s path.
Speaker vibration can travel through nearby shelves. Use another surface or verify that ordinary listening does not shift the holder.
Door traffic and swinging bags can bump nearby shelves. Choose a position outside the door arc and walking path.
A stair ledge can be narrow and exposed to bumps. Use a stable, broad shelf rather than a ledge or handrail.
Window seats can receive sunlight and be used for sitting or placing items. Use a shelf beyond the seating surface and monitor direct light.
Children may move objects or reach for cards. Choose a stable shelf and decide whether the card is for viewing or handling.
Paints, tools and materials can create dust or spills. Place holders away from worktables and use a separate clean display shelf.
Screens and speakers create reflections and vibration. Select a separate shelf away from screen glare, vents and speaker movement.
Dining surfaces are used for meals and may expose cards to spills. Place the holder on a side cabinet away from food and serving areas.
Living rooms have many sightlines and regular visitor traffic. Choose a stable shelf visible from seating but outside walking paths.
Book storage and bedside lighting can crowd a bedroom shelf. Reserve a measured section for the card and keep books from contacting the holder.
Speakers, instruments and cases can create vibration or movement. Place the holder away from speakers and instrument storage.
Craft supplies can spill, shed fibres or cover the display. Use a separate clean shelf away from cutting, gluing and painting areas.
Low light can hide card detail and make photos inaccurate. Add soft ambient light and avoid direct bright spots on the protector.
Other people may move items or use the same shelves. Agree on a location that is clearly personal display space and out of work paths.
Shared dorm rooms have limited surfaces and frequent movement. Choose a compact shelf with clear consent from roommates about shared space.
Entryways are busy drop zones for bags, keys and parcels. Use a side shelf out of the door swing and avoid the main console surface.
Movement and equipment can create vibration, sweat or accidental contact. Place cards in a separate dry room or enclosed shelf away from exercise paths.
Playrooms involve moving toys and frequent reaching. Use a high, stable display shelf and clearly separate cards intended for viewing.
A guest office may be rearranged for visitors or work. Use a stable shelf that does not need to be cleared for desk tasks.
Workshop dust and tools may damage or obscure cards. Place the holder in a clean office section away from the workbench.
Recording equipment, tripods and cables can move around the room. Place the holder outside cable runs and the camera’s equipment footprint.
A low shelf may place a card near pets, children or passing feet. Check traffic and choose a protected surface away from floor activity.
Doors may reflect light or strike an item placed too close. Measure internal depth and leave clearance for the full door swing.
A hutch can be close to work materials and overhead lights. Reserve one compartment for the holder and inspect the lamp angle.
Monitor heat and screen reflections can affect the nearby view. Place the holder beyond vents and check the card face from the seated position.
Media consoles can have equipment vents and cable access. Use an open shelf away from devices and leave space around the holder.
Craft cabinets may store paints, glues and sharp supplies nearby. Use a clean closed bay separate from materials that can spill or shed dust.
Low light can hide artwork and invite harsh flash photography. Use soft ambient light and position the holder where it can be viewed clearly.
Strip lights can create colour casts or direct reflections. Use indirect placement and check the card with the lighting on.
A movable lamp may shine directly across the card face. Adjust the shade and card position so the light falls nearby rather than reflecting into the viewer.
A tall lamp can cast shadows or glare across a shelf. View the card from the seat and adjust the lamp angle or shade.
Cabinet lights may shine directly onto a protective case. Test the cabinet with lights on and off, adjusting the holder position if possible.
Photography lights may be bright and run warm. Use the manufacturer’s safe distance and keep cards outside direct heat.
Backlight can outline a holder but wash out card artwork. Keep the light behind the holder and test visibility of the card face.
Setting the Viewing Height for a Card Display after changing a sleeve or case: the new enclosure’s width, height, thickness and edge shape. measure the complete protected card rather than assuming the old fit still applies.
Choosing a Surface for a Card Display when space is limited: the smallest clear area that still keeps the card visible and reachable. prioritize one focal card and rotate the rest instead of packing holders tightly together.
Displaying a Card in a Small Apartment before ordering a holder: the exact enclosure, selected design and published product information. compare the full outside dimensions with the stated slot and read the inclusion notes.
Displaying a Card in a Home Office after changing a sleeve or case: the new enclosure’s width, height, thickness and edge shape. measure the complete protected card rather than assuming the old fit still applies.
Displaying a Card in a Bedroom when displaying a set: the group’s order, visual theme and amount of space available. choose a subset or sequence that leaves gaps and preserves each card’s visibility.
Displaying a Card Near Books during a card rotation: a clean staging area, the replacement card and safe storage for the current one. prepare both cards before starting and complete one careful change at a time.
Displaying a Card Near a Game Console in a shared room: other people’s movement, shared surfaces and the chance of accidental contact. choose a stable defined area away from food, bags, doors and high-use surfaces.
Displaying a Card in a Shared Room when photographing the setup: camera level, light reflection, full holder visibility and sample-card context. capture a level front view plus a side view and use soft indirect light.
Displaying a Card in a Glass Cabinet during a final setup review: card seating, visible artwork, holder stability and the surrounding environment. check front, side and base, then review light, dust, moisture and nearby activity.
Displaying a Card Beside Books when space is limited: the smallest clear area that still keeps the card visible and reachable. prioritize one focal card and rotate the rest instead of packing holders tightly together.
Displaying a Card Under a Shelf Light after changing a sleeve or case: the new enclosure’s width, height, thickness and edge shape. measure the complete protected card rather than assuming the old fit still applies.
Displaying a Card Beside a Desk Organizer during a card rotation: a clean staging area, the replacement card and safe storage for the current one. prepare both cards before starting and complete one careful change at a time.
Displaying a Card in a Teen Room in a shared room: other people’s movement, shared surfaces and the chance of accidental contact. choose a stable defined area away from food, bags, doors and high-use surfaces.
Displaying a Card in a Small Office when preparing a custom request: exact measurements, card orientation, support visibility and style preferences. separate must-have fit requirements from optional colour or decoration requests.
Displaying a Card at the End of a Bookshelf during a final setup review: card seating, visible artwork, holder stability and the surrounding environment. check front, side and base, then review light, dust, moisture and nearby activity.
Displaying a Card Near a Home Entry before choosing a location: the available shelf, everyday traffic and viewing angle. measure the usable surface first, then allow room around the holder for safe access.
Choosing Room Light for Card Artwork when space is limited: the smallest clear area that still keeps the card visible and reachable. prioritize one focal card and rotate the rest instead of packing holders tightly together.
Planning a Display for Evening Viewing when displaying a set: the group’s order, visual theme and amount of space available. choose a subset or sequence that leaves gaps and preserves each card’s visibility.
Planning a Display for Daylight Viewing during a card rotation: a clean staging area, the replacement card and safe storage for the current one. prepare both cards before starting and complete one careful change at a time.
Choose which trading cards to feature by balancing personal meaning, visual impact, condition, available space and the card’s protective needs.
Group trading cards into a display theme using a shared subject, story or visual detail, then keep the arrangement clear enough for each card to stand out.
Create a story-led trading card display by choosing a beginning, middle and finish, then arranging the cards so the sequence is easy to follow.
Show a completed trading card set by making the checklist visible, grouping cards in set order and leaving gaps where missing pieces can be added later.
Bring cards from different games into one display with a shared organizing rule, clear group boundaries and enough space for varied card sizes.
Display duplicate trading cards with a purpose by choosing one featured copy, grouping extras neatly and keeping trade or storage cards separate from the main focal display.
Build a trading card timeline by choosing a small number of milestones, placing them in chronological order and labeling dates only when you can verify them.
Show a favorite team or character group by selecting a few representative cards, making their relationship clear and avoiding visual clutter around the lineup.
Group trading cards by artwork style using a visible shared feature such as linework, palette or composition, then keep unrelated styles in separate sections.
Record the card, enclosure and holder used in a display so you can recreate the setup and answer fit questions later.
Use simple, non-contact labels to tell storage and display groups apart while keeping adhesive materials away from cards and holder surfaces.
Plan a rotating card display with a simple schedule and a shortlist of cards, so swaps are deliberate and each card spends time stored safely.
Start a compact card display collection with a clear theme, a limited number of featured cards and room to change the arrangement over time.
Choose a feature card by considering its visual balance, personal meaning and confirmed fit with the holder you plan to use.
Use a display to mark a collecting milestone by choosing one card tied to the event and keeping the story clear with a small, separate note.
Arrange cards by colour by choosing a consistent visual cue, separating similar shades clearly and avoiding a layout that hides key artwork.
Build a character-focused display by selecting cards that show a clear relationship and arranging them so each individual card remains visible.
A collection may include very different illustration styles that do not naturally form one group. Decide whether to group similar styles together or deliberately alternate them, then keep that rule consistent.
Colour groups become hard to scan if similar shades are scattered without a visible order. Sort by one consistent feature, such as dominant artwork colour, and use small gaps between groups.
Frequent swaps can lead to unnecessary handling and forgotten storage locations. Pick a modest rotation schedule and list the cards that are safe and suitable to display.
It can be difficult to remember which card, protector and holder were used together. Record the card identifier, enclosure, holder design and current location in a private log.
Related cards may not be obviously connected to visitors. Use a short separate label to name the set, theme or memory behind the group.
A shelf may become crowded as a collection grows. Reserve a small amount of space or rotate featured cards rather than compressing holders.
The next feature card may not be suited to the holder or viewing environment. Choose a card you want to see and confirm its enclosure matches the holder before swapping.
A full set may not fit a single shelf with comfortable viewing and handling space. Decide whether to feature representative cards or use a broader layout with measured spacing.
Identical cards can make a display look repetitive without a clear reason for showing more than one. Compare condition, artwork or personal context and group duplicates deliberately.
Release dates can be confusing when a collection includes multiple sets or languages. Choose one source of ordering and record the dates or set sequence consistently.
A personal story may not be apparent from the card alone. Choose one or two cards tied to the memory and add a short separate note if helpful.
Important details can be overlooked when assembling a new display. Write down the card enclosure, holder, surface, light conditions and intended orientation.
Different owners may have different preferences for which cards are shown. Agree on a simple rotation or theme and record each card’s owner and storage place privately.
A small set may offer several possible groupings. Choose the theme that is easiest to recognize from the cards themselves.
A memorable game moment may be represented by cards with different artwork or set styles. Pick the few cards that best tell the moment and place them in a consistent sequence.
Related forms can look repetitive when the order is not clear. Use a consistent grouping such as evolution order or artwork release sequence.
Border styles can vary across sets and make a display feel visually uneven. Group matching borders or alternate them intentionally to create a rhythm.
A collection can include works that share an artist or visual technique. Identify a clear visual similarity and choose representative cards that show it.
Cards from multiple sets can be mixed accidentally when stored or displayed. Check set identifiers and keep the chosen order consistent in your notes.
Different card languages can create a clear display distinction or a mixed visual pattern. Decide whether to group by language or use language as a deliberate comparison.
Era labels may be unclear when a collection spans multiple game or release periods. Choose a specific date or set-based boundary and keep it consistent.
A personal artwork theme may not be obvious from card names. Choose a shared visual quality such as colour, composition or setting.
A collection goal can become difficult to track when display and storage records differ. Write down the goal, what counts as complete and which cards are featured.
Milestone cards may be meaningful for reasons a visitor cannot infer. Select the card that best represents the event and keep a short note in your collection log.
A collection story can be difficult to follow when its order is unclear. Choose a beginning, middle and ending and arrange cards in one consistent direction.
Cards may share a name but have different compositions or colour balance. Compare the artwork itself and group cards according to a clear visual idea.
A broad theme can become difficult to recognize as more cards are added. Write the theme in one sentence and use it to decide what belongs in the display.
Seasonal changes can tempt collectors to move too many cards too often. Choose a small featured group and rotate it on a comfortable schedule.
A setup may be hard to reproduce if measurements and options are scattered. Record the holder name, card enclosure, dimensions, colour choice and orientation in one place.
Card, sleeve and holder measurements can be confused when recorded informally. Use separate labelled fields for card, enclosure and holder opening, with units.
Original packaging may help protect a holder if it is moved or stored. Keep packaging dry and label it with the matching holder design.
Accessories can clutter a display or create risks when stored beside cards. Keep tools and spare sleeves in a separate labelled container.
Collection details can be hard to recall after a card is moved or sold. Record card identifiers, enclosure, location and date in a private note.
A borrowed card can be misplaced if its owner and return date are not recorded. Note the owner, card identification, enclosure and agreed return date privately.
After a rotation, the display and storage record may no longer match. Update the card locations and note which holder is currently in use.
A long-term display plan can become repetitive or encourage too many swaps. Choose a few seasonal or collection themes and leave each display in place for a comfortable period.
A mini gallery can feel crowded if every card is selected independently. Set one visual or story theme and limit the group to cards that fit it.
A large collection room can still feel disorganized if every shelf follows a different rule. Choose consistent zones for storage, display, work and reference notes.
Cabinets can hide card groups when shelves are densely packed. Group cards by a consistent theme and use unobtrusive labels.
Binders can crowd or cover a featured holder. Store binders upright in a separate section and reserve a clear feature area.
Storage boxes may be stacked near a display and create pressure or dust. Keep boxes below or away from the holder and use labels to identify stored cards.
A collection map can become too detailed to read near a small card. Use a simple nearby diagram that explains how the displayed cards relate.
A checklist may distract if it is longer than the display. Show only the relevant set or goal and keep the full checklist in your notes.
Timeline dates can be unclear if sources or periods are not named. Use one consistent date reference and a small number of milestones.
A story note can become long enough to compete with card art. Write one or two sentences about why the card matters.
A partial set display may be mistaken for a complete set. Label the selection as highlights or show a checklist that distinguishes missing cards.
Cards can be left out longer than intended without a reminder. Use a simple private calendar to plan occasional changes and storage checks.
A replacement sleeve may not fit the holder the same way as the old one. Record the case type, dimensions and holder model for a confirmed setup.
A photo alone may not show the measurements or enclosure. Take front and side images and write the exact setup details alongside them.
Publicly sharing a full inventory can expose more information than needed. Keep card identifiers and storage locations in a private record.
Arranging Cards by Artwork Style before ordering a holder: the exact enclosure, selected design and published product information. compare the full outside dimensions with the stated slot and read the inclusion notes.
Creating Colour Groups in a Card Display in a shared room: other people’s movement, shared surfaces and the chance of accidental contact. choose a stable defined area away from food, bags, doors and high-use surfaces.
Planning a Card Rotation Calendar during a card rotation: a clean staging area, the replacement card and safe storage for the current one. prepare both cards before starting and complete one careful change at a time.
Keeping an Inventory of Displayed Cards in a shared room: other people’s movement, shared surfaces and the chance of accidental contact. choose a stable defined area away from food, bags, doors and high-use surfaces.
Labelling Card Display Groups when photographing the setup: camera level, light reflection, full holder visibility and sample-card context. capture a level front view plus a side view and use soft indirect light.
Planning a Display for New Collection Additions when preparing a custom request: exact measurements, card orientation, support visibility and style preferences. separate must-have fit requirements from optional colour or decoration requests.
Choosing a Card for the Next Rotation during a final setup review: card seating, visible artwork, holder stability and the surrounding environment. check front, side and base, then review light, dust, moisture and nearby activity.
Planning a Display for a Trading Card Set before choosing a location: the available shelf, everyday traffic and viewing angle. measure the usable surface first, then allow room around the holder for safe access.
Displaying Duplicate Trading Cards when space is limited: the smallest clear area that still keeps the card visible and reachable. prioritize one focal card and rotate the rest instead of packing holders tightly together.
Displaying Cards by Release Date before ordering a holder: the exact enclosure, selected design and published product information. compare the full outside dimensions with the stated slot and read the inclusion notes.
Displaying Cards by Personal Memory after changing a sleeve or case: the new enclosure’s width, height, thickness and edge shape. measure the complete protected card rather than assuming the old fit still applies.
Creating a Card Display Checklist when displaying a set: the group’s order, visual theme and amount of space available. choose a subset or sequence that leaves gaps and preserves each card’s visibility.
Creating a Display for a Shared Collection before ordering a holder: the exact enclosure, selected design and published product information. compare the full outside dimensions with the stated slot and read the inclusion notes.
Choosing a Theme for a Small Card Set when displaying a set: the group’s order, visual theme and amount of space available. choose a subset or sequence that leaves gaps and preserves each card’s visibility.
Organizing Cards Around a Game Moment during a card rotation: a clean staging area, the replacement card and safe storage for the current one. prepare both cards before starting and complete one careful change at a time.
Organizing Cards by Character Forms in a shared room: other people’s movement, shared surfaces and the chance of accidental contact. choose a stable defined area away from food, bags, doors and high-use surfaces.
Organizing Cards by Border Style when photographing the setup: camera level, light reflection, full holder visibility and sample-card context. capture a level front view plus a side view and use soft indirect light.
Organizing Cards by Illustration Style when preparing a custom request: exact measurements, card orientation, support visibility and style preferences. separate must-have fit requirements from optional colour or decoration requests.
Organizing Cards by Set during a final setup review: card seating, visible artwork, holder stability and the surrounding environment. check front, side and base, then review light, dust, moisture and nearby activity.
Organizing Cards by Language before choosing a location: the available shelf, everyday traffic and viewing angle. measure the usable surface first, then allow room around the holder for safe access.
Organizing Cards by Era when space is limited: the smallest clear area that still keeps the card visible and reachable. prioritize one focal card and rotate the rest instead of packing holders tightly together.
Organizing Cards by Favourite Artwork before ordering a holder: the exact enclosure, selected design and published product information. compare the full outside dimensions with the stated slot and read the inclusion notes.
Organizing Cards by Collection Goal after changing a sleeve or case: the new enclosure’s width, height, thickness and edge shape. measure the complete protected card rather than assuming the old fit still applies.
Organizing Cards by Personal Milestone when displaying a set: the group’s order, visual theme and amount of space available. choose a subset or sequence that leaves gaps and preserves each card’s visibility.
Creating a Story Sequence with Cards during a final setup review: card seating, visible artwork, holder stability and the surrounding environment. check front, side and base, then review light, dust, moisture and nearby activity.
Comparing Card Artwork Before Grouping before choosing a location: the available shelf, everyday traffic and viewing angle. measure the usable surface first, then allow room around the holder for safe access.
Choosing a Theme for a Card Display Collection when space is limited: the smallest clear area that still keeps the card visible and reachable. prioritize one focal card and rotate the rest instead of packing holders tightly together.
Planning a Seasonal Card Display Rotation before ordering a holder: the exact enclosure, selected design and published product information. compare the full outside dimensions with the stated slot and read the inclusion notes.
Making a Card Display Reference Sheet after changing a sleeve or case: the new enclosure’s width, height, thickness and edge shape. measure the complete protected card rather than assuming the old fit still applies.
Creating a Holder Measurement Record during a final setup review: card seating, visible artwork, holder stability and the surrounding environment. check front, side and base, then review light, dust, moisture and nearby activity.
Check whether a trading card holder will fit your shelf or desk by comparing its full width, depth and height with the space you have available.
Plan custom text for a trading card holder by keeping it brief, checking spelling and placement, and confirming the listing’s personalization options before purchase.
Use symmetry in a trading card display by matching the number and spacing of items on each side while keeping one clear focal point.
Create an asymmetrical card display by balancing one prominent holder with smaller supporting objects and leaving open space where the arrangement needs visual rest.
Use height levels to make several trading cards visible by keeping taller holders behind shorter ones and checking that no card artwork is blocked.
Arrange three trading cards in a triangle composition by giving the tallest or most meaningful card a clear anchor position and keeping the other two balanced around it.
Arrange trading cards on a long narrow shelf by keeping holders aligned, grouping them into short sections and leaving gaps that prevent a continuous crowded row.
Arrange trading card holders inside a bookcase by checking shelf clearance, choosing a visible position and separating the display from books that could press against it.
Use negative space around a trading card holder to separate it from nearby objects, emphasize its shape and make the card artwork easier to notice.
Combine portrait and landscape cards by grouping orientations carefully, keeping card edges aligned where possible and ensuring neither format blocks the other.
Create a staggered row by offsetting holders slightly in depth while keeping every card visible, each base stable and enough space between neighboring designs.
Keep a trading card’s important details visible by checking the card face from normal viewing distance and positioning nearby holders away from key text areas.
Use small labels to explain a trading card display by keeping wording brief, placing labels beside holders and avoiding adhesives on cards or protective enclosures.
Design a display for a small card collection by choosing a repeatable layout, leaving space for future additions and avoiding a setup that depends on a large shelf.
Angle a room lamp toward the nearby surface rather than directly into the card, then check whether the light creates glare from your usual viewing position.
Display cards near a mirror only after checking reflected windows, lamps and room movement, since the mirror can add visual clutter or redirect bright light.
Compare warm and cool room lighting around a trading card display by checking how each setting changes the apparent colours and readability of the artwork.
Use LED lighting around a trading card display by placing the light source away from the card face, managing reflections and following the fixture instructions.
Reduce night reflections by changing the room lights or display angle, then checking the card from the positions where people usually view it.
Compare listing photos by checking the front, side and back views, visible supports, scale references and whether the card shown is illustrative.
Read holder dimensions by identifying width, depth and height, checking the measurement units and comparing them with the full outside size of the card enclosure.
Before ordering a card holder, review its listing photos, product details, sample-card note, dimensions, options and return information.
Choose between two card holder designs by comparing fit details, shelf footprint, viewing angle and the appearance that best suits your collection.
Treat a card shown in a product photo as a sample unless the listing explicitly says it is included; review the item description for the exact purchase contents.
Review the shipping destination, service, calculated rate and any quote requirement shown at checkout before submitting an order.
A product can look right while its dimensions or included items differ from expectations. Read the options, dimensions, card exclusion note and product description carefully.
Width, depth and height labels can be misread in a rotated 3D view. Identify each axis from the dimension guide and confirm the units used.
The front view may conceal supports, slot depth or the direction a card faces. Compare front and side views and follow the visible support path around the card.
Sample card artwork can show scale and appearance without being part of the item sold. Read the listing’s included-items note and the product title rather than inferring contents from the image.
Overall height alone does not show how much shelf width and depth a holder needs. Compare the base footprint of each design with the available shelf space.
A product configurator may combine colour, size and personalization choices. Review each selected option and compare the displayed item price before adding to cart.
The checkout total includes distinct product and shipping amounts. Read each cart line and shipping line separately, then compare them with the final total.
Some baskets may need a shipping quote instead of an automatic rate. Review the destination, holder size, quantity and any quote notice shown in the cart.
A converted local-currency price may look different from a listing’s default currency. Check the displayed currency code and compare the converted amount with the item price.
A personalization surcharge can appear near the product price or after choosing text. Check the stated surcharge and selected text on the product page before adding to cart.
A customer may need to understand order-change and return terms before checkout. Read the current returns information linked from the site and note any stated conditions.
Photos may show cards, cases or decorations that are only examples. Look for the package contents and card/protector exclusion note on the product page.
A wrong size or text selection may be easier to catch before checkout. Review the design, quantity, options, personalization and item price in the summary.
Product images may use different angles, lighting or sample cards. Compare views for consistent details and identify which image shows the actual holder.
Similar titles may hide differences in size, options or intended use. Compare dimensions, card opening, materials and the purchase contents line by line.
A rotated model can make the intended front and back easy to confuse. Use the view controls to inspect the card face, holder front and decorative side.
A model can look larger or smaller depending on screen layout and camera zoom. Use the ruler guide and stated dimensions rather than browser size.
A small phone screen can make controls and fine model details hard to see. Rotate or enlarge the preview using the available controls and check the card face at a useful scale.
A preview can answer appearance questions but may not communicate every product specification. Inspect the front, back and side views, and note where supports meet the card.
A size option may affect both the card opening and the holder footprint. Compare the selected size with the card enclosure measurements and shelf space.
A cart may retain old options if a product choice was changed after adding it. Review the displayed image, colour, size, text and quantity on each cart line.
Quantity affects the item subtotal and may affect shipping weight or quote requirements. Confirm the number of holders in the cart and compare the line total with the unit price.
Several holders can change package weight and available shipping calculation. Check the destination and the cart’s displayed shipping tier for the full basket.
A wide desktop page can place choices and previews far apart. Check that the selected options, product preview and price all correspond to the same listing.
Mobile layouts may place options in scrollable panels below a persistent product view. Move through each selection section and confirm it is not hidden by a sticky footer.
A quote-only item does not have a firm purchase price for immediate checkout. Follow the listing’s enquiry process and provide the details requested for a quote.
An unanswered fit or option question can lead to an unsuitable order. Include the product link, exact card enclosure and the option you are unsure about.
A sample card shown in a holder may be mistaken for an included item. Read the card-not-included and package contents notes on the current product page.
Several designs can create a complicated cart with different options and quantities. List each holder, size, colour and quantity before selecting them online.
A holder’s external measurements do not guarantee that a card fits its opening. Review the footprint, slot width, depth and height as separate specifications.
Broad fit claims may not apply to every sleeve, case or card variation. Look for specific dimensions and stated compatibility rather than a general guarantee.
A preferred design may have options or shipping charges beyond the initial item price. Set a total budget and review item price, customization and shipping separately.
Different holder prices may reflect different sizes or options. Compare the exact configuration and item line for each design.
A surcharge may be shown in more than one place on a product page. Compare the product price, text option and cart line.
The payment total may include product lines, shipping and currency conversion. Review every amount and the currency code before continuing.
Options and prices can change after a saved link or screenshot is made. Use the current live product page and review selections afresh.
A product photo may not update for every selected colour or size. Check the preview and option labels after each selection.
Desktop layouts can place selection controls beside a large model preview. Scroll the product details and inspect each choice before adding the holder.
Mobile screens may show only part of a scrollable option panel at first. Open each tab or section and scroll within the selection area to review size, sample and details.
A design selector may offer many similar holder names. Use the design name and preview together to identify the intended product.
Returning to a full listing page for each design can interrupt comparison. Use a design selector when available, then compare preview, options and price.
Sample artwork may demonstrate a holder but does not necessarily ship with it. Compare sample choices for appearance and review the card-inclusion note.
Customers may not know whether a card shown in a photo is included. Read and preserve clear text that names the holder, sample card and accessories.
Unlabelled dimensions can confuse shoppers. State width, depth, height and units in a consistent order.
Sample card imagery can be mistaken for the item being sold. State prominently whether cards and protectors are examples or included.
A customer may not know the text limit or surcharge. State the character limit, placement and surcharge next to the option.
Swatch colours may vary by screen. Name options clearly and explain that on-screen previews are illustrative when appropriate.
A shipping rate can depend on destination, quantity or product size. Read destination restrictions and quote notices on the live cart.
Return eligibility and order-change conditions should not be assumed. Read the published store terms and check for details about custom items.
A customer may need to ask about dimensions or options before checkout. Use the current contact link on the website and include the relevant product reference.
A support request can be difficult to match without a reference. Use the order number or product link when contacting the store.
A final checkout page may combine options, tax, shipping and currency. Review each item, quantity, destination and amount line by line.
A localized currency may differ from a product’s base display currency. Check the currency code and the payment provider’s final total.
A quantity selector can be changed without updating every other expectation. Check the selected number and multiply it against the unit price.
Different holder designs may have different sizes and shipping eligibility. Review each product line and check the basket’s combined shipping treatment.
Larger designs may not use the same shipping tier or fit assumptions as standard holders. Check the selected size and any quote-only notice.
A custom quote may cover details not present in a standard listing. Compare the written quote with the design, quantity, price and shipping agreed.
Sample artwork may change while the holder remains the same. Check that the intended sample appears in the preview and note its illustrative status.
Changing size can affect the card opening, overall footprint and price. Recheck dimensions and shelf space after selecting the new size.
Changing quantity may update subtotal and package weight. Check the new item count and subtotal in the cart.
A cart image may not reflect the latest product customization. Compare it with the selected listing and note visible colour or size differences.
A final preview may show an approximate screen rendering. Review the chosen colours, size, text and card orientation together.
A product title may not explain all exclusions or dimensions. Read the description, options, sample note and shipping information.
One hero image may hide the back, slot and scale. Look for a front, side, back and dimension view.
Ruler marks and axis labels may be shown in a rotated perspective. Identify the axis by the diagram label and note the unit.
A rate table may apply only to specific destinations, services and weight tiers. Check the destination zone, service name, weight limit and currency.
Selecting the wrong country can show an irrelevant rate. Enter the destination country accurately before interpreting the shipping line.
International orders may show localized prices and destination-specific shipping. Check the currency, product lines, country and shipping service.
An error may be caused by an address, quote gate or unavailable option. Read the message and verify the selected destination and basket details.
A refreshed cart can restore stored choices or expose an outdated selection. Check every item, option and quantity after the page reloads.
A saved link may open a product whose options or price have changed. Read the current title, price and specifications on the live page.
Mobile cart rows may place options and totals below the product image. Scroll through each line and expand details before checkout.
A wide cart page can visually separate item details from shipping. Compare each product line with the selected listing and inspect the shipping section below.
A return page may confirm that checkout has resumed but not necessarily establish payment status by itself. Use the store’s verified order or payment confirmation as the source of truth.
An email or page may summarize details differently from the cart. Compare the order reference, items, quantities, currency and total with what you submitted.
A receipt can be useful for tracking an order and resolving questions. Save the provider’s receipt and store order reference in a secure place.
A shipping notice may use a carrier service name or tracking reference. Compare it with the order details and keep the tracking link.
Carrier scans may not describe the package condition or contents. Check the tracking page and delivery location, then inspect the package when received.
A damaged parcel may need prompt documentation and seller contact. Take clear photos of packaging and items before discarding materials.
A selected size or colour may differ from the order summary. Compare the order confirmation with the cart details and record the discrepancy.
A typo may appear in an order despite the intended text. Check the order summary and any confirmation proof.
A shipping quote needs the destination and full basket details. Include country, holder designs, size options and quantities requested.
A large product may fall outside standard weight or packaging rules. Share the product size and full destination with the seller.
Unverified weight means an automatic shipping tier may not apply. Provide the exact products and quantities and follow the site’s quote process.
A basket above the published weight range may need a manual rate. List each product and quantity so the package can be assessed.
Similar tracked services may have different names and conditions. Read the exact service label in the cart and payment summary.
A tier applies only when the full packed basket fits its published limit. Check the item quantity, package weight and service table.
Product weight alone does not include protective packing and mailer materials. Use the verified packed weight supplied for the order, not a guessed item weight.
A rate may change when the destination or basket changes. Compare the destination, product size, quantity and weight tier before checkout.
Shipping and product amounts may be displayed in a localized currency. Read the currency code on each line and ensure totals use the same currency.
A service may not be available for every country or product size. Enter the actual delivery country and follow the message shown by the cart.
Eligibility or timing may depend on the current store policy and item type. Read the published terms and ask about any condition that is not stated.
An order may be processed before a requested change is received. Use the store’s published contact channel and include the order reference quickly.
A vague question may require several follow-ups. State the product name, selected option and exact detail you need clarified.
A store may receive questions about several similar listings. Include the exact product link or name and selected size.
A purchase decision combines card fit, room space, options and total cost. List the card enclosure, shelf dimensions, design and budget before browsing.
Remembering the differences between several listings can be difficult. Record each design’s dimensions, options, price and fit questions in a table.
Aesthetic similarity can hide different slot dimensions and base footprints. Compare design, orientation, slot, overall dimensions and price.
A checklist can overemphasize appearance and miss fit details. Include enclosure size, orientation, support position, shelf footprint and package contents.
The item price may not represent the full checkout cost. Set a budget for holder, options and shipping separately.
Product details can become inconsistent across page, cart and checkout. Compare title, options, price, currency and inclusion notes at each stage.
A guide may link to a holder whose options change. Use the product page for current specifications and keep the article’s claims general.
Readers may confuse a themed holder with an official licensed product. Use clear independent fan-inspired context and avoid implying endorsement.
Sample images can create uncertainty about what the purchase includes. State plainly whether cards and protectors are not included.
A visual preview cannot confirm every card, sleeve or protector combination. Direct readers to stated dimensions and the exact enclosure measurement.
Screens and lighting can change perceived colour. Use the product option label and note that a preview is illustrative if appropriate.
Photography can show a configuration that is not the exact purchase option. Label sample cards, accessories and selected options clearly.
A rate may depend on destination, packed weight and service. State the scope and limit of a published tier accurately.
A product price may differ across page, cart and payment. Compare the same selected configuration and currency at each step.
Older policy links or screenshots may no longer reflect current terms. Use the site’s current policy page and note its publication context.
A question sent through the wrong route may be harder to resolve. Use the current contact link and provide a concise product or order reference.
Order details can be hard to retrieve after checkout. Keep the confirmation, item options and receipt in a private place.
A broken image can leave a customer without a product reference. Open the listing and verify every image loads at the public URL.
A 3D render helps explore orientation but may not represent final colour or fit exactly. Rotate the model and inspect support, opening and card placement.
A model can appear upside down when its base or support plane is misread. Identify the actual resting plane and intended upright view before rotating.
A camera angle can make a correctly seated card appear to float. Reset to a front view and inspect side and base contact separately.
A card can look centered from one angle and misplaced from another. Compare its bottom edge, slot depth and support contacts from the side.
A gap in a render may come from an incorrect transform or viewing angle. Inspect the card’s attachment point and the holder geometry from a low side view.
The slot may be hidden behind a decorative shell or rail. Rotate the view and look for the exact plane where the enclosure enters.
Rails may cross the visible card face or be intended as rear supports. Compare their position with the holder front and card plane.
A base can be hidden by a dramatic viewing angle. Inspect the underside and contact surface and compare with the dimension guide.
The rear can show retainers not visible from the front. Inspect the back without assuming that the display face is reversed.
A side view can reveal a gap or a misaligned slot. Use a level side view and identify contact between card, slot and base.
A front view should make the card and display design understandable. Check that the card is upright, centered as intended and not hidden by supports.
Zoom controls can change apparent model size on screen. Use ruler labels and written dimensions to compare scale.
A ruler may be angled in perspective and hard to read. Reset the model and note the measurement labels and units.
Auto-rotate and zoom can make it difficult to compare specific views. Pause rotation, reset, and use named front, back and side buttons.
Touch gestures may rotate or zoom the model unexpectedly. Use the control buttons first and pinch only when the page supports it.
Mouse drag and scroll may control rotation and zoom differently. Use the named camera buttons and reset between comparisons.
A model may remain at an unusual angle after several rotations. Use Reset to return to the listing’s initial view.
Continuous rotation can hide an important fit or support detail. Pause auto-rotation at the front and inspect fixed side views.
Zooming can crop the holder base or card edges. Zoom in for details, then reset or zoom out to check the complete product.
A drag may rotate the model when the user intended to scroll the page. Use the page’s named controls and drag within the model area only.
A scrollable option panel may look like it has reached its end. Swipe inside the option panel and check each labelled section.
A 3D preview needs a browser and device that support WebGL. Check that the model loads and try a modern browser if the canvas is blank.
A blank canvas can result from a loading, browser or asset issue. Refresh once, check network connection and try a WebGL-capable browser.
Large models can take time to render on mobile devices. Close unused tabs, wait for the model and use a stable connection.
A small screen may make fine support details hard to see. Use a WebGL-capable desktop or tablet for detailed inspection when available.
Two models can be shown at different zoom levels. Reset both and compare the same view and ruler units.
A sample card can appear detached or obscure part of a holder. Inspect its bottom edge and slot from side and front views.
Rendered colours depend on screen and lighting. Compare the selected option name with the visible model.
Small text may be hard to inspect in a rotating model. Pause rotation, zoom in and check spelling in the final selected view.
A view can make a support appear in front when it is actually behind. Rotate to a true side view and identify which parts intersect the card plane.
A camera angle can distort how the model is oriented. Compare a known front view with the side and back and look for consistent supports.
A sample card can be rendered separately from the holder geometry. Look for a consistent slot relationship from several angles.
A visible gap may be a real placement issue or perspective. Inspect the card base in side view and compare its edge with the slot.
A rail crossing the card may be a support on the wrong side or a view issue. Compare front and back to identify the intended support side.
A model shown on its side can make the intended base difficult to identify. Find the broad resting surface and compare it with the dimensions and front view.
The initial view is often the first impression for shoppers. Check that the card and holder look upright and that the sample sits correctly.
Front images can hide the depth of a card slot. Use a level side view and follow the card edge down to its support.
The back view may show a retainer or brace hidden from the front. Rotate to the back and trace how the support connects to the holder.
A card can look centered from the front but sit off-axis. Use the top view to compare the card center with the holder slot.
The underside can show feet or structural elements that affect stability. Inspect the bottom for the intended contact plane and dimensions.
Left and right views can be confused if the model has rotated. Reset the model and use the named left view.
A right-side view may reveal a card edge or support hidden on the opposite side. Use the named right view after reset and check the holder’s front direction.
The front view should show whether the card is upright and readable. Check centering, visible artwork and any rails across the card face.
A plain backplate may be visible when a sample card is flipped or occluded. Check whether the artwork texture appears on the intended face and inspect both sides.
A card mesh may load while its artwork texture fails. Compare the visible card surface with the selected sample and reload the listing once.
A correctly loaded image may sit behind a support or another model part. Rotate the model and check the card plane relative to rails and shell geometry.
A card may be attached correctly but outside the visible frame. Reset and inspect all named views before changing zoom or position.
The backplate may face forward when the card texture is oriented backward. Compare the intended front face with the holder’s front view and sample card selection.
A model can appear to face downward when its coordinate axis differs from the display axis. Identify the intended base plane and inspect the initial view before applying a rotation.
Decorative shapes may make an intended top or base ambiguous. Use the actual support surface, card slot and dimension ruler to identify upright orientation.
A model may appear to float when its base is not aligned with the scene floor. Inspect the mesh origin and base plane in the preview views.
A support may intersect the card mesh and cover visible artwork. Inspect the card plane and support from front and side angles.
A card can appear slightly offset when its centre does not match the slot. Compare left and right edges and trace the card into the opening.
The selected sample may not be the image rendered on the model. Confirm the option label, sample thumbnail and card face match.
Older or restricted browsers may not render WebGL models. Use an up-to-date browser with graphics acceleration available.
Graphics settings can prevent a model from loading. Check browser graphics support and restart the page after enabling standard acceleration.
Model assets may load slowly over a weak connection. Wait for the asset and check whether the card image loads separately.
Small screens can hide fine details even when the model works. Use the available zoom and named views or inspect on a larger display.
Important issues can be missed when only the initial view is checked. Inspect default, front, back, left, right, top and bottom views.
A report may be hard to reproduce without the product and view details. Include the product URL, selected sample, named view and a screenshot.
A code change may fix one angle but break another. Recheck the default, front, back and side views after a correction.
A staged model may differ from the live product after deployment. Check the selected product and sample on the deployed page after release.
General feedback such as “looks wrong” can be difficult to act on. Name the product, selected card, view and visible issue.
A digital render cannot establish the tolerances of a physical print. Use the preview for appearance and written dimensions for planning.
Material and screen colour can differ from rendered pixels. Use the named selection and available material examples.
A render may not communicate texture or surface finish accurately. Read product material notes and request clarification about finish.
Sample artwork may be illustrative and may not ship with the holder. Read inclusion notes and check whether the sample can be changed.
Model zoom makes a digital product appear any size on screen. Use the ruler guide and written dimensions.
A rendered card may use a demonstration transform rather than a verified physical seat. Inspect the slot and supports and read the listing’s fit details.
A model may not show every valid orientation or support option. Use the listing’s named orientation and sample view.
A saved article may point to a design that has changed or been hidden. Check the current product page for its active options and checkout state.
A holder page may change while older guide content remains. Use the current listing for price, options and dimensions.
A guide can be useful without implying every linked holder fits every card. Open the product page and compare its actual specifications.
Advice can become unreliable when it relies on assumed measurements. Reference the current product information or explain which details need confirmation.
Readers benefit when an article states what it cannot confirm. Separate display inspiration from measured compatibility and policy terms.
An old checkout screenshot may show outdated prices or services. Explain the checkout fields without asserting a current amount.
A generic policy example can be mistaken for the store’s actual terms. Link to the current published policy and distinguish general guidance.
A sample rate may apply to only one destination or packed weight. State the destination, service and basket scope of the example.
An illustrative card may be mistaken for an item for sale. Label the card as a sample and state whether it is excluded.
A size example may not match another product option. Name the selected design and size and list the unit.
One image may show a card transform not used by another holder. Name the product and view and describe the visible support relationship.
Rotating an image can confuse front and back directions. Label the view and the intended upright base plane.
A sample order may show outdated options or prices. Keep the example generic and explain which live checkout details to verify.
Product data may be duplicated across several systems. Use the catalog or current product listing as the authority.
A displayed price may be copied into the wrong part of an order. Check the catalog price, selected option and server-created checkout line.
A shipping rate may be overwritten or mismatched with the item amount. Check the separate shipping line and server-calculated basket rate.
A sample image may come from a selected card choice rather than the holder itself. Review the sample selector and image asset that loads with it.
A generic social graphic may not show the actual product. Use an accessible image of the selected holder and check that it matches the listing.
A content page can drift from the actual catalog. Compare product name, price, images and options with the current catalog data.
Fans may confuse inspiration with official affiliation. Use independent fan-inspired language and avoid suggesting endorsement.
A guide can accidentally promise fit, durability or delivery. Check every product claim against a published specification or policy.
Prices may change or vary with selected options. Link to the current listing instead of embedding a stale amount.
A guide may outlive a product’s availability. Avoid permanent stock promises and direct readers to the live listing.
Delivery estimates can depend on destination and service. Use only published timing details and identify their scope.
A render may make material or finish look more specific than stated. Use the listing’s actual material information.
Compatibility can depend on the exact protective case. Compare measured dimensions and state which setup was checked.
Return terms can change and may depend on the order type. Use the current published policy and avoid adding unconfirmed windows.
A guide may repeat a rate without mentioning its weight or destination limit. Name the service, zone and published tier accurately.
The photo can show items not included with the holder. Use the product’s written contents list and sample-card disclaimer.
A themed item may be mistaken for an official product. Describe the business and design independently and accurately.
A guide may claim an item is in stock without live inventory data. Use current availability from the product page.
Invented identifiers can misrepresent a product. Use a stable internal product ID only when it is real and maintained.
Ratings and testimonials must come from real customers. Do not create review schema or quote reviews that do not exist.
Comparing products with different measurement methods can mislead. Use the same units and distinguish slot from overall dimensions.
Some questions depend on a card case or order not covered by general advice. Share the exact product and dimensions through the published contact route.
Preparing Before Buying a Card Holder when displaying a set: the group’s order, visual theme and amount of space available. choose a subset or sequence that leaves gaps and preserves each card’s visibility.
Reading Card Holder Dimension Labels during a card rotation: a clean staging area, the replacement card and safe storage for the current one. prepare both cards before starting and complete one careful change at a time.
Comparing Front and Side Product Views in a shared room: other people’s movement, shared surfaces and the chance of accidental contact. choose a stable defined area away from food, bags, doors and high-use surfaces.
Understanding Sample Artwork in Product Listings when photographing the setup: camera level, light reflection, full holder visibility and sample-card context. capture a level front view plus a side view and use soft indirect light.
Comparing Card Holder Footprints when preparing a custom request: exact measurements, card orientation, support visibility and style preferences. separate must-have fit requirements from optional colour or decoration requests.
Checking Holder Options Before Adding to Cart during a final setup review: card seating, visible artwork, holder stability and the surrounding environment. check front, side and base, then review light, dust, moisture and nearby activity.
Understanding Item Price and Shipping Separately before choosing a location: the available shelf, everyday traffic and viewing angle. measure the usable surface first, then allow room around the holder for safe access.
Reviewing Shipping Quote Requirements when space is limited: the smallest clear area that still keeps the card visible and reachable. prioritize one focal card and rotate the rest instead of packing holders tightly together.
Checking Order Currency Before Payment before ordering a holder: the exact enclosure, selected design and published product information. compare the full outside dimensions with the stated slot and read the inclusion notes.
Understanding Personalization Price Display after changing a sleeve or case: the new enclosure’s width, height, thickness and edge shape. measure the complete protected card rather than assuming the old fit still applies.
Reviewing Returns Information Before Ordering when displaying a set: the group’s order, visual theme and amount of space available. choose a subset or sequence that leaves gaps and preserves each card’s visibility.
Checking What Is Included in a Holder Order during a card rotation: a clean staging area, the replacement card and safe storage for the current one. prepare both cards before starting and complete one careful change at a time.
Reviewing a Card Holder Order Summary in a shared room: other people’s movement, shared surfaces and the chance of accidental contact. choose a stable defined area away from food, bags, doors and high-use surfaces.
Checking Card Holder Product Photography during a card rotation: a clean staging area, the replacement card and safe storage for the current one. prepare both cards before starting and complete one careful change at a time.
Comparing Card Holder Listing Descriptions in a shared room: other people’s movement, shared surfaces and the chance of accidental contact. choose a stable defined area away from food, bags, doors and high-use surfaces.
Checking Card Face Direction in a Preview when preparing a custom request: exact measurements, card orientation, support visibility and style preferences. separate must-have fit requirements from optional colour or decoration requests.
Evaluating Scale in a 3D Holder Preview before choosing a location: the available shelf, everyday traffic and viewing angle. measure the usable surface first, then allow room around the holder for safe access.
Checking a Card Holder Preview on Mobile when space is limited: the smallest clear area that still keeps the card visible and reachable. prioritize one focal card and rotate the rest instead of packing holders tightly together.
Using a Display Preview Before Ordering before ordering a holder: the exact enclosure, selected design and published product information. compare the full outside dimensions with the stated slot and read the inclusion notes.
Choosing a Card Holder Size Option when displaying a set: the group’s order, visual theme and amount of space available. choose a subset or sequence that leaves gaps and preserves each card’s visibility.
Reviewing the Cart After Changing Product Options in a shared room: other people’s movement, shared surfaces and the chance of accidental contact. choose a stable defined area away from food, bags, doors and high-use surfaces.
Checking Quantity in a Holder Order when photographing the setup: camera level, light reflection, full holder visibility and sample-card context. capture a level front view plus a side view and use soft indirect light.
Planning Shipping for Multiple Card Holders when preparing a custom request: exact measurements, card orientation, support visibility and style preferences. separate must-have fit requirements from optional colour or decoration requests.
Reviewing a Holder Order on Desktop during a final setup review: card seating, visible artwork, holder stability and the surrounding environment. check front, side and base, then review light, dust, moisture and nearby activity.
Reviewing a Holder Order on a Phone before choosing a location: the available shelf, everyday traffic and viewing angle. measure the usable surface first, then allow room around the holder for safe access.
Understanding a Quote-Only Product Listing when space is limited: the smallest clear area that still keeps the card visible and reachable. prioritize one focal card and rotate the rest instead of packing holders tightly together.
Asking a Question Before Ordering a Holder before ordering a holder: the exact enclosure, selected design and published product information. compare the full outside dimensions with the stated slot and read the inclusion notes.
Keeping Card and Holder Purchase Details Clear after changing a sleeve or case: the new enclosure’s width, height, thickness and edge shape. measure the complete protected card rather than assuming the old fit still applies.
Planning a Holder Order for a Collection when displaying a set: the group’s order, visual theme and amount of space available. choose a subset or sequence that leaves gaps and preserves each card’s visibility.
Separating Product Size from Card Fit before choosing a location: the available shelf, everyday traffic and viewing angle. measure the usable surface first, then allow room around the holder for safe access.
Reviewing Card Holder Fit Claims when photographing the setup: camera level, light reflection, full holder visibility and sample-card context. capture a level front view plus a side view and use soft indirect light.
Planning a Card Display with a Budget when preparing a custom request: exact measurements, card orientation, support visibility and style preferences. separate must-have fit requirements from optional colour or decoration requests.
Comparing Two Card Holder Prices during a final setup review: card seating, visible artwork, holder stability and the surrounding environment. check front, side and base, then review light, dust, moisture and nearby activity.
Checking a Custom Text Surcharge before choosing a location: the available shelf, everyday traffic and viewing angle. measure the usable surface first, then allow room around the holder for safe access.
Reading the Checkout Total Before Payment when space is limited: the smallest clear area that still keeps the card visible and reachable. prioritize one focal card and rotate the rest instead of packing holders tightly together.
Checking Current Options on a Holder Listing before ordering a holder: the exact enclosure, selected design and published product information. compare the full outside dimensions with the stated slot and read the inclusion notes.
Matching a Product Image to Selected Options after changing a sleeve or case: the new enclosure’s width, height, thickness and edge shape. measure the complete protected card rather than assuming the old fit still applies.
Choose a holder size by measuring the available shelf width, depth and height, then leaving room to handle and view the display comfortably.
Plan a card display shelf with a clear focal point, stable positions and enough spacing to remove or clean holders without disturbing the rest.
Use a stable shelf or desktop to display a trading card without wall mounting, and check the holder’s footprint and base before choosing the surface.
Several attractive cards can compete for attention when they receive equal space. Choose one card as the visual anchor, then place supporting cards so their relationship is easy to understand.
A holder may fit the shelf width but still leave too little usable depth or sit close to an edge. Measure the clear shelf depth and compare it with the holder’s stated footprint.
Closely packed holders are harder to reach and can hide side details or card edges. Arrange the holders with enough clearance to lift one without nudging its neighbours.
A long row can look uneven when holder sizes and card orientations vary. Start with the largest or most visually important design and balance the remaining pieces around it.
A compact desk often has little spare space and may be moved or shared. Measure the free corner and select a freestanding design only if its listing says it is intended for that use.
A narrow shelf may not support the full base even when the holder appears small. Compare the exact holder depth with the shelf’s usable depth and leave a margin.
Two layouts can seem equally attractive until you view them from normal room positions. Sketch both arrangements or use paper outlines to compare spacing and sightlines.
A screen preview does not show how a holder footprint fits a particular shelf. Cut a paper outline using the listed base dimensions and place it on the intended surface.
Different holder heights can block cards behind them. Place taller pieces toward the back only if their bases remain stable and their cards are visible.
Public areas bring more touching, sunlight and accidental contact than a private shelf. Choose a card and enclosure you are comfortable showing in that environment.
Game rooms can be busy, with controllers, drinks and frequent movement. Choose a higher stable shelf outside play surfaces and device vents.
A floating shelf may have a limited load or depth. Check the shelf maker’s load information and compare the holder footprint with the usable area.
A growing collection can spread across a room without a clear organizing area. Choose one shelf or cabinet section for cards, storage notes and featured displays.
Several hobbies may compete for shelf space and visual attention. Group the card display in a dedicated area with a clear theme.
People may accidentally knock a holder when reaching for nearby objects. Move frequently used items away and leave a clear buffer around the display.
Symmetry can look uneven when card counts or holder widths differ. Set a center line and balance visual weight on both sides rather than matching every object exactly.
An uneven arrangement can look accidental without a visual anchor. Choose one focal card and use smaller gaps or related objects to guide the eye.
Different card orientations can interrupt the rhythm of a row. Group orientations or use one landscape card as a deliberate visual break.
A second row can hide cards in the first if the heights and sightlines are not planned. Use spacing and placement that preserve clear views of every card face.
Permanent changes to a shelf can make it harder to revise a layout later. Use movable freestanding holders and separate labels when possible.
An event table may be crowded and involve frequent handling by visitors. Use a stable, low-traffic part of the table and clearly separate display items from sale items.
Trade tables are busy and cards may be moved frequently. Keep displayed cards behind a clear boundary and identify items that are for viewing only.
Shared meeting spaces can have limited surfaces and changing attendees. Choose one display card and place it where it will not block work or discussion.
Public events need clear, non-disruptive displays and visible context. Use a stable surface and a brief label that explains the collection theme.
Show tables may have overhead glare and competing displays. Use a clean backdrop and arrange cards so each one has a clear sightline.
A long shelf can make holders seem scattered if no grouping is planned. Break the surface into small themed zones with a clear gap between each.
Corner angles can hide the side of a holder or create tight access. Orient the card toward the room and leave enough space to remove it safely.
A deep shelf can make a small display appear lost at the back. Bring the holder forward while retaining a safe margin from the shelf edge.
A shallow surface leaves little room for a holder base. Measure the exact depth and compare it with the stated product footprint.
A bookcase bay may have fixed dimensions and limited light. Measure its width, height and depth and leave room for card access.
Books on both sides can make it hard to remove the holder. Leave a deliberate gap and make sure book movement does not touch the card.
Renters may need a display that does not alter walls or furniture. Choose a stable freestanding holder and verify that the product is designed for tabletop placement.
A temporary room may have unfamiliar shelves and changing conditions. Use one portable holder on a measured, stable surface.
A meeting room has shared surfaces and changing furniture layouts. Place the holder on a side shelf away from tables and chairs.
A wall-mounted desk can flex or vibrate during use. Check the desk’s stability and avoid placing the holder near its edge.
Glass can be slippery or reflective depending on the holder base and light. Confirm the display rests securely and follow the product’s surface guidance.
A wood shelf may have uneven grain, dust or a narrow edge. Choose a flat section and clean it before placing the holder.
Metal shelves can vibrate and may feel cold or unstable. Check that the shelf is level and that the holder base has secure contact.
Office shelves may mix work documents with personal collectibles. Create a distinct shelf for cards and keep work materials from covering them.
A small bedroom may have limited flat surfaces. Use a measured wall shelf or compact desk corner if stable and permitted.
Limited shelves may be shared with remote controls and household items. Create one clear display area and rotate featured cards as needed.
One room serves several functions and has little spare shelf space. Choose one display zone that is separate from cooking, sleeping and work activities.
Hallway displays can be brushed by bags and make narrow routes feel tighter. Choose a side niche or shelf with clearance from the walking path.
Family rooms combine screens, snacks and different people’s routines. Place the holder on a dedicated shelf away from drinks and controls.
Storage, binders and featured cards can mix together without a dedicated area. Separate active trading cards from display pieces and long-term storage.
Multiple shelves can create uneven spacing or hidden lower cards. Plan the shelf positions with paper outlines and check sightlines from the room.
A corner bookcase may have angled shelves and limited front access. Place the holder where the card faces the room and can be removed without disturbing books.
Narrow shelves limit both depth and room for hands. Measure the shelf and leave enough space to lift the holder safely.
A high shelf can make a card hard to see and reach. Place frequently viewed cards near eye level on a stable shelf.
A cube shelf may have a fixed opening and dark interior. Measure the bay and place the card where the full holder remains visible.
Wall cubes may have shallow bases and installation limits. Check the shelf’s rated use and compare the holder footprint with the base.
Competing goals can make a holder choice difficult. Rank fit, artwork visibility, footprint, colour and cost by importance.
A growing collection may overrun a shelf planned only for today. Set a maximum number of holders and a rotation plan before adding more.
A shelf reorganization can disturb a stable card or lose its order. Photograph and record the current layout before moving items.
A sample shelf may differ from a reader’s furniture and traffic. Describe the principle, then ask readers to measure their own space.
A layout can be copied without accounting for different holder sizes. Include spacing principles and ask readers to measure their own products.
A safe-looking example may not match another room’s traffic or surfaces. Explain the hazard being avoided and ask readers to check their own layout.
Planning a Display Around One Focal Card before choosing a location: the available shelf, everyday traffic and viewing angle. measure the usable surface first, then allow room around the holder for safe access.
Using Shelf Depth for a Card Display when displaying a set: the group’s order, visual theme and amount of space available. choose a subset or sequence that leaves gaps and preserves each card’s visibility.
Spacing Multiple Card Holders during a final setup review: card seating, visible artwork, holder stability and the surrounding environment. check front, side and base, then review light, dust, moisture and nearby activity.
Planning a Balanced Row of Card Displays before choosing a location: the available shelf, everyday traffic and viewing angle. measure the usable surface first, then allow room around the holder for safe access.
Displaying a Card on a Dorm Desk when preparing a custom request: exact measurements, card orientation, support visibility and style preferences. separate must-have fit requirements from optional colour or decoration requests.
Displaying a Card on a Narrow Shelf before choosing a location: the available shelf, everyday traffic and viewing angle. measure the usable surface first, then allow room around the holder for safe access.
Comparing Two Card Display Layouts during a card rotation: a clean staging area, the replacement card and safe storage for the current one. prepare both cards before starting and complete one careful change at a time.
Using Paper Templates to Plan a Shelf in a shared room: other people’s movement, shared surfaces and the chance of accidental contact. choose a stable defined area away from food, bags, doors and high-use surfaces.
Arranging Holders with Different Heights when photographing the setup: camera level, light reflection, full holder visibility and sample-card context. capture a level front view plus a side view and use soft indirect light.
Choosing a Card for a Public Display when preparing a custom request: exact measurements, card orientation, support visibility and style preferences. separate must-have fit requirements from optional colour or decoration requests.
Planning a Display for a Game Room during a final setup review: card seating, visible artwork, holder stability and the surrounding environment. check front, side and base, then review light, dust, moisture and nearby activity.
Displaying a Card on a Floating Shelf when displaying a set: the group’s order, visual theme and amount of space available. choose a subset or sequence that leaves gaps and preserves each card’s visibility.
Creating a Trading Card Collecting Corner when photographing the setup: camera level, light reflection, full holder visibility and sample-card context. capture a level front view plus a side view and use soft indirect light.
Displaying Cards in a Hobby Room when space is limited: the smallest clear area that still keeps the card visible and reachable. prioritize one focal card and rotate the rest instead of packing holders tightly together.
Setting a Safe Reach Zone Around a Display during a final setup review: card seating, visible artwork, holder stability and the surrounding environment. check front, side and base, then review light, dust, moisture and nearby activity.
Displaying Cards in a Symmetrical Layout before ordering a holder: the exact enclosure, selected design and published product information. compare the full outside dimensions with the stated slot and read the inclusion notes.
Displaying Cards in an Asymmetrical Layout after changing a sleeve or case: the new enclosure’s width, height, thickness and edge shape. measure the complete protected card rather than assuming the old fit still applies.
Combining Landscape and Portrait Card Displays during a card rotation: a clean staging area, the replacement card and safe storage for the current one. prepare both cards before starting and complete one careful change at a time.
Displaying Cards in Staggered Rows in a shared room: other people’s movement, shared surfaces and the chance of accidental contact. choose a stable defined area away from food, bags, doors and high-use surfaces.
Making Card Display Changes Reversible when preparing a custom request: exact measurements, card orientation, support visibility and style preferences. separate must-have fit requirements from optional colour or decoration requests.
Overhead lights can reflect across sleeves or cases. Use soft indirect light and move the light source or camera until reflections leave the card face.
A tilted camera can make a holder appear distorted or a card seem incorrectly seated. Keep the camera level with the card and align the holder vertically in the frame.
A front-only photo can hide slot depth and support contact points. Take a side view at card height with steady light and a clean background.
A product photo without scale cues can be hard to interpret. Place a ruler next to the holder without covering the base or card.
Clear protectors and shiny card art can reflect windows and lamps. Move the light source off-axis and adjust the camera slightly while keeping the card upright.
A patterned or similarly coloured background can distract from the holder. Use a plain surface with enough contrast to separate the base and card edges.
A perspective photo can mislead viewers about the product’s physical scale. Pair the image with written dimensions and capture a level view beside a ruler.
A group photo can make each individual card too small to inspect. Use an overview for the whole arrangement and separate close-ups for individual designs.
Personalized text can become unreadable when the camera is too far away. Take one full product view and one close-up that shows the text clearly.
Different camera angles can make a change in a display seem larger or smaller than it is. Use the same viewpoint, lighting and distance for both reference photos.
A single image may not preserve enough detail to recreate a setup later. Capture front and side views, then note the enclosure and holder used.
A photo may unintentionally include private details or make sample items seem included. Check the frame for personal information, reflections and objects not part of the holder.
Viewers can mistake a close crop for the holder’s actual size. Include a ruler or a familiar object and provide written dimensions in the caption.
Different lighting can make colour options appear inconsistent across photos. Use the same light, background and camera settings for each swatch or holder.
Small supports and openings can disappear in a wide product shot. Capture a close-up of the slot, base and card contact area with sufficient light.
Side depth and support can be obscured by a front-only image. Place the camera at the holder’s side and keep the lens level.
The back can reveal support structure that is hidden from the front. Photograph the rear in even light and keep the holder upright.
An isolated product image does not show how a holder relates to a shelf or desk. Take one wider photo with the holder in a normal room setting and a separate close-up.
Direct sun may wash out artwork or create reflections. Use indirect daylight near a bright window but outside the sunbeam.
Mixed lamps may introduce uneven shadows or colour casts. Use one soft light source and avoid placing it directly in line with the card.
One image rarely answers questions about appearance, scale and fit. Prepare a consistent set of front, side, detail and scale views.
A set of images may contain inconsistent orientations or missing views. Check that front, side and scale views agree about the same product.
A reference image may belong to a creator or collector. Record its source and follow the creator’s stated reuse terms.
Original photos help distinguish a product listing from generic imagery. Photograph the actual holder in consistent light with accurate sample-card context.
Mixed backgrounds and framing can make a catalogue feel uneven. Use a repeatable background, image size and set of views.
A tight crop may hide the base or sample card relationship. Keep the full holder visible in a square crop and use detail images separately.
A tall product image may look small inside a square tile. Use a square composition that preserves the holder’s proportions and readable details.
Small thumbnails can lose fine details. Center the holder and keep enough contrast around its outline.
Unclear filenames are hard to manage across a large catalog. Use a stable design identifier and a view or size label.
Customers may need several angles to assess a holder. Plan front, side, back, detail and in-context photos.
Before-and-after images can imply a change that the product does not support. Keep camera position and lighting consistent and describe the actual modification.
A screenshot may show controls or rulers over the product. Reset to front view, zoom enough to show the card and base, then capture.
An image may be inaccessible or depict a different configuration. Open the asset and confirm it matches the article and product context.
A photo can make a temporary arrangement look like a product guarantee. Caption the image and explain what the example demonstrates.
A dramatic angle may distort product proportions. Use a level view for dimensions and a separate angled image for style.
Large images can slow a long guide index. Use appropriately sized compressed assets and lazy load below the fold.
An inaccessible image leaves a blank space in the article. Check the asset path and file availability on the live site.
Repeated images may make distinct articles feel interchangeable. Select the image that best illustrates the specific question or use a relevant detail crop.
A promotional image may exaggerate scale or include unavailable items. Use accurate product photography and label sample cards clearly.
An image that exists locally may fail after deployment. Verify the public image path and test it from the live site.
Lighting a Card Display for Photos before choosing a location: the available shelf, everyday traffic and viewing angle. measure the usable surface first, then allow room around the holder for safe access.
Photographing a Card Holder from the Front when space is limited: the smallest clear area that still keeps the card visible and reachable. prioritize one focal card and rotate the rest instead of packing holders tightly together.
Photographing a Card Holder from the Side before ordering a holder: the exact enclosure, selected design and published product information. compare the full outside dimensions with the stated slot and read the inclusion notes.
Photographing a Card Display with a Ruler after changing a sleeve or case: the new enclosure’s width, height, thickness and edge shape. measure the complete protected card rather than assuming the old fit still applies.
Photographing a Card Holder Without Glare when displaying a set: the group’s order, visual theme and amount of space available. choose a subset or sequence that leaves gaps and preserves each card’s visibility.
Choosing a Background for Holder Photography during a card rotation: a clean staging area, the replacement card and safe storage for the current one. prepare both cards before starting and complete one careful change at a time.
Photographing a Holder for a Size Reference in a shared room: other people’s movement, shared surfaces and the chance of accidental contact. choose a stable defined area away from food, bags, doors and high-use surfaces.
Photographing a Group of Card Displays when photographing the setup: camera level, light reflection, full holder visibility and sample-card context. capture a level front view plus a side view and use soft indirect light.
Photographing a Personalized Card Holder when preparing a custom request: exact measurements, card orientation, support visibility and style preferences. separate must-have fit requirements from optional colour or decoration requests.
Comparing Before-and-After Display Photos during a final setup review: card seating, visible artwork, holder stability and the surrounding environment. check front, side and base, then review light, dust, moisture and nearby activity.
Photographing a Display for a Collection Log before choosing a location: the available shelf, everyday traffic and viewing angle. measure the usable surface first, then allow room around the holder for safe access.
Reviewing a Display Before Sharing Photos when displaying a set: the group’s order, visual theme and amount of space available. choose a subset or sequence that leaves gaps and preserves each card’s visibility.
Showing Holder Scale in a Photo during a card rotation: a clean staging area, the replacement card and safe storage for the current one. prepare both cards before starting and complete one careful change at a time.
Photographing Colour Options Consistently in a shared room: other people’s movement, shared surfaces and the chance of accidental contact. choose a stable defined area away from food, bags, doors and high-use surfaces.
Photographing Holder Details Close Up when photographing the setup: camera level, light reflection, full holder visibility and sample-card context. capture a level front view plus a side view and use soft indirect light.
Taking a Clear Side Photo of a Holder when preparing a custom request: exact measurements, card orientation, support visibility and style preferences. separate must-have fit requirements from optional colour or decoration requests.
Taking a Clear Back Photo of a Holder during a final setup review: card seating, visible artwork, holder stability and the surrounding environment. check front, side and base, then review light, dust, moisture and nearby activity.
Photographing a Holder in Room Context before choosing a location: the available shelf, everyday traffic and viewing angle. measure the usable surface first, then allow room around the holder for safe access.
Photographing a Card Display in Daylight when space is limited: the smallest clear area that still keeps the card visible and reachable. prioritize one focal card and rotate the rest instead of packing holders tightly together.
Photographing a Card Display at Night before ordering a holder: the exact enclosure, selected design and published product information. compare the full outside dimensions with the stated slot and read the inclusion notes.
Photographing a Holder for an Online Listing after changing a sleeve or case: the new enclosure’s width, height, thickness and edge shape. measure the complete protected card rather than assuming the old fit still applies.
New collectors may be unsure where to start with fit, space and care. Choose one card, identify its exact protective enclosure and measure the intended shelf.
The rarest card is not always the one a collector most wants to see daily. Pick a card with personal meaning and consider its condition and protective needs.
A small collection can feel crowded when every card is placed out at once. Feature a few cards with a shared idea and store the rest safely for rotation.
A change in card condition may be difficult to identify later without a reference. Take private, well-lit photos of the card and note its sleeve or case before display.
Cards can be forgotten when rotation choices are made without a record. Keep a short list of cards, display periods and storage locations.
A set display can lose its intended order during cleaning or rotation. Record the sequence and the position of each featured card.
Duplicate cards can be difficult to locate or compare when storage labels are inconsistent. Use a consistent set identifier and note differences such as artwork or enclosure.
A wishlist can mix display ideas, card wants and purchase details in a confusing way. Separate cards you want to collect from holders or accessories you are considering.
A milestone may become less memorable if its story is not recorded. Write a date, short context and the card tied to the event in a private collection log.
A display theme can feel vague when it includes cards with no visible connection. Define the theme in one sentence and select only cards that clearly support it.
Planning a First Trading Card Display when displaying a set: the group’s order, visual theme and amount of space available. choose a subset or sequence that leaves gaps and preserves each card’s visibility.
Choosing a First Card to Display during a card rotation: a clean staging area, the replacement card and safe storage for the current one. prepare both cards before starting and complete one careful change at a time.
Building a Small Collector Display in a shared room: other people’s movement, shared surfaces and the chance of accidental contact. choose a stable defined area away from food, bags, doors and high-use surfaces.
Recording Card Condition Before Display when photographing the setup: camera level, light reflection, full holder visibility and sample-card context. capture a level front view plus a side view and use soft indirect light.
Organizing a Card Rotation List when preparing a custom request: exact measurements, card orientation, support visibility and style preferences. separate must-have fit requirements from optional colour or decoration requests.
Creating a Set Display Checklist during a final setup review: card seating, visible artwork, holder stability and the surrounding environment. check front, side and base, then review light, dust, moisture and nearby activity.
Organizing Duplicate Cards in Storage before choosing a location: the available shelf, everyday traffic and viewing angle. measure the usable surface first, then allow room around the holder for safe access.
Creating a Card Collection Wishlist when space is limited: the smallest clear area that still keeps the card visible and reachable. prioritize one focal card and rotate the rest instead of packing holders tightly together.
Documenting a Collecting Milestone before ordering a holder: the exact enclosure, selected design and published product information. compare the full outside dimensions with the stated slot and read the inclusion notes.
Creating a Personal Card Display Theme after changing a sleeve or case: the new enclosure’s width, height, thickness and edge shape. measure the complete protected card rather than assuming the old fit still applies.
Images need concise descriptions so non-visual visitors understand their relevant content. Name the holder, visible card orientation and meaningful visual detail without repeating every page word.
Long paragraphs can make practical advice difficult to find. Use descriptive headings, short paragraphs and ordered steps for actions.
Short option labels can be ambiguous without context. Use plain names for size, colour and sample choices, with units where they help.
A large guide library is harder to browse when topics are not grouped. Group articles under clear themes and use a searchable directory.
A summary can sound vague if it does not say what the reader can do next. State the practical choice, the main check and any uncertainty in plain language.
Broken guide links leave visitors unable to reach the promised information. Use stable paths and verify each new article after publishing.
Titles that repeat the same phrase may be hard to distinguish. Name the real question or decision answered by each guide.
Categories may overlap as a library grows. Use a small set of reader-facing topics and apply them consistently.
A long directory is difficult to scan manually. Search by the card, holder or decision you need help with.
Sitemaps list URLs but do not explain which guide answers a question. Use the topic directory for browsing and the sitemap for a page list.
A canonical identifies the preferred URL for a page. Use the published article URL and avoid creating alternate duplicate paths.
Product options and policy details can change over time. Recheck factual claims and live product links before revising an article.
An outdated or inaccurate detail can mislead a reader. Identify the exact sentence and compare it with current product information.
Repeated questions may signal that the library misses a useful topic. Record the customer question and determine whether it is distinct from existing guides.
Many articles can become repetitive without a defined series structure. Group related questions and give each page a distinct reader task.
A high article count does not ensure that each page helps a reader. Check accuracy, distinct purpose, useful steps and current links.
Reader confusion can point to missing explanations or unclear labels. Note recurring questions and revise the relevant article or product page.
A guide may be hard to use with a keyboard, screen reader or small display. Use descriptive headings, meaningful links, alt text and readable contrast.
Long guides can become difficult to navigate on a narrow screen. Use descriptive section headings and short paragraphs.
Readers may need a sequence from choosing a card to caring for a display. Arrange related pages in a practical order and link a next step where useful.
A reader may finish one answer and need a related check. Link only to closely related pages such as fit, options or care.
A generic introduction delays the answer a reader came for. State the decision or problem and what the guide will help the reader check.
Advice is hard to use when it does not tell the reader what to inspect. Use concrete checks such as measuring, comparing or reviewing a listed option.
Generic alt text does not explain what is visible. Describe the holder and card position in plain language.
A photo may be misunderstood without a caption. Explain whether the card is a sample, what view is shown and any important context.
A decorative image may not help readers who cannot see it. Add concise alt text to meaningful product views and mark purely decorative images appropriately.
A visual model may be difficult to operate without a mouse or touch gestures. Use labelled buttons and keyboard focus for named views where available.
Search visibility depends on pages that answer real reader questions. Write for a specific task and provide accurate, practical steps.
Repeated keywords can make advice awkward and hard to read. Use the phrases readers need in a natural title and explanation.
A vague description does not tell a searcher what the article covers. State the problem and the practical check in a concise sentence.
An internal link is less useful when its label says only “click here.” Use words that describe the destination and next step.
Readers need a clear route into a large guide collection. Group related pages under visible categories and provide a search tool.
An article can miss its audience if it answers a different question than its title. Define the reader’s task before writing and keep the sections focused on it.
A page that repeats existing advice gives readers little reason to use it. Add a specific checklist, comparison or scenario that is not covered elsewhere.
A growing library can accumulate stale links and overlapping topics. Review links, titles and product facts in regular batches.
Two pages may answer the same question with little difference. Compare their reader tasks and merge overlapping material into one stronger guide.
Older pages may point to missing products or changed options. Verify every live link and remove outdated statements.
A simple factual error can mislead product decisions. Check dimensions, currency, policy and service claims against current sources.
Product options may change after an article is published. Update references and remove claims no longer supported by the live listing.
Repeated questions can show where guides are unclear. Collect common questions without exposing customer messages or identities.
Publishing many pages at once can make quality review difficult. Plan topics in small clusters and review each cluster before release.
A guide may be unique but still contain a broken link or unsupported claim. Check title, purpose, factual support, image, canonical and mobile readability.
The same phrase can signal different needs such as inspiration, fit or checkout help. Identify what the reader is trying to decide and structure the article around that task.
Technical wording can make a straightforward fit issue harder to understand. Use familiar terms and explain dimensions or enclosure types in context.
Advice can feel incomplete when actions appear in a confusing order. Put preparation first, then the action, then the final check.
A checklist can hide important context if it is only a list of labels. Explain why each check matters and what result to look for.
A comparison can be misleading if products are measured differently. Use the same dimensions, options and currency for each product.
An FAQ may repeat existing page content without adding clarity. Use real recurring questions and answer them directly.
An example can be mistaken for a universal rule. Name the scenario and explain which parts may differ in another setup.
A customer question may contain private details. Rewrite the underlying issue as a general question and remove identifying context.
A date stamp can imply a review that did not occur. Record meaningful changes and update only after checking the content.
Changing slugs can split links and search signals. Choose a clear stable slug and redirect old URLs if a change is necessary.
New pages may be missed if the sitemap uses an older data list. Generate sitemap entries from the same guide source as article routes.
A crawl rule can prevent public guide pages from being discovered. Review robots.txt and confirm the public guide paths are allowed.
Client-only text may not be available to crawlers or visitors with scripts disabled. Use server-rendered page content and direct article URLs.
A link may work after navigation but fail when opened directly. Open the canonical URL in a new tab and refresh it.
A published URL is not guaranteed to be indexed. Make the article useful, crawlable, internally linked and accurately described.
Structured data must match visible article content. Use accurate title, description, image and publisher fields.
A schema image may be missing or unrelated to the article. Use a publicly accessible image that accurately represents the page.
Search title, on-page heading and schema may disagree. Use the same topic and meaning across the title fields.
A meta description can promise an answer the page does not contain. Summarize the actual steps and limits of the guide.
A directory may be difficult to navigate if link labels are vague. Use article titles as anchor text and preserve keyboard navigation.
Too many narrow categories can create clutter in a large library. Group pages by the reader’s main task and use clear category labels.
A directory with many links is hard to scan manually. Search across titles and descriptions and keep topic groups available.
Long category lists can become unwieldy on mobile screens. Use compact expandable topics and a clear search field.
A large directory can load too many images or scripts. Use lazy-loaded photos and keep list imagery limited.
Thousands of links can overwhelm a page if shown all at once. Group by topic and filter search results as readers type.
A large publishing schedule can produce overlapping or shallow pages. Review uniqueness, usefulness and accuracy before each release.
A topic may already be covered by an existing page. Search the library and identify the specific unanswered question.
A short search phrase may conceal a practical decision. Identify whether the reader needs inspiration, fit, care or checkout guidance.
An unplanned article can repeat itself or omit a key step. Outline the decision, checks, actions and limits before drafting.
A typo or broken link can reduce confidence in the guide. Proofread, check images, verify links and confirm the article title matches the answer.
A broken link interrupts a reader who is following a guide. Open the destination and confirm it resolves to the intended product or article.
A canonical pointing to the homepage can obscure an article’s identity. Check the rendered canonical against the article’s stable production URL.
Duplicate titles make pages difficult to distinguish. Compare the actual topics and retitle only when each page has a distinct purpose.
Two URLs for the same article can split navigation and indexing signals. Choose one canonical path and redirect or remove duplicate routes.
Duplicate sitemap paths add noise without helping readers. Compare each URL and preserve only the canonical version.
Articles with near-identical advice can frustrate readers. Define the unique task each article serves and cross-link complementary pages.
A guide can become too broad to answer any one question well. Limit it to a defined card, holder or room decision.
An article may provide facts without helping the reader decide. State what the reader should be able to check or choose at the end.
A library can feel disconnected when tone changes between articles. Use plain language, direct steps and realistic limits.
Dense wording can hide a simple choice. Use short sentences and explain unfamiliar terms at first use.
Trust can be damaged by invented prices, fit claims or policy terms. State what is known, identify what needs confirmation and use current product data.
Readers may rely on information that later proves outdated. Update the page promptly and check related internal links or product labels.
Handling valuable cards or mounting products may involve risks. Recommend gentle handling and following product instructions.
A control may not be accessible just because it has an icon. Check keyboard operation, labels, visible focus and screen reader names.
Publishing a page does not guarantee search indexing or traffic. Make useful content crawlable and monitor search performance over time.
A large page count can magnify thin or repetitive content. Publish only when each article answers a distinct, useful question.
A topic can be split too finely into near-duplicate articles. Look for separate user decisions before making another page.
Related articles need a clear relationship, not just repeated keywords. Create a central guide and supporting pages for distinct steps.
A hub can become a large list without a navigation plan. Organize links by reader task and offer search.
A visitor may search for a symptom rather than a category. Index guide titles and short descriptions in the site search.
A broad search may return too many articles. Allow visitors to narrow by care, fit, layout, photos or buying decisions.
Searchers need to know whether their query matched anything. Show the number of matches and a helpful empty state.
A failed query can leave a visitor stuck. Offer a prompt to try a shorter phrase or browse topics.
Search controls can be hard to use without a mouse. Label the input and make results reachable with keyboard focus.
Search result changes may not be announced to assistive technology. Use a labelled input and an accessible result count or status.
A small keyboard can obscure a mobile search result list. Keep the search field near the top and results compact.
A thousand pages are not useful if a visitor cannot find one. Use topic groups, titles, summaries and search rather than one unstructured wall.
More pages mean more links and factual details to review. Track canonical routes, image files and topics in one source.
Separate content copies can drift across pages and sitemap entries. Generate article routes, directory links and sitemap from one guide dataset.
A large content update can expose broken URLs if it is not checked. Build first and inspect representative articles, image paths and sitemap URLs.
A version note helps the owner know when articles changed. Record the release version and the number of new or revised guides.
An outdated article may still receive search visits. Update, redirect or remove it based on whether its topic remains useful.
Repeated articles can make a large directory harder to use. Compare their actual advice and keep the strongest page for each task.
Pages can become stale as products, options and policies change. Review high-traffic and product-linked guides first.
Page views do not show whether readers found an answer. Use privacy-respecting feedback prompts or common support questions.
Traffic alone does not show whether pages help customers. Review impressions, visits and useful next actions with consent and privacy controls.
A reader may need product details after learning the general steps. Link to a relevant listing or contact page only when it answers the next question.
A hub can hide useful answers if FAQ items are mixed with unrelated links. Group FAQs by fit, care, product options and checkout.
Visitors may arrive directly at one article from search. Provide a path back to the guide hub and nearby related topics.
Category counts can help but may become confusing if duplicates are included. Count unique article URLs and update the total from the source data.
Search cannot find articles if only page body text is indexed poorly. Include title and description in the directory’s search data.
A content map can reveal gaps and duplicate articles. Map each guide to one buyer or collector question.
A guide may be publishable but still lack actionable value. Check whether it gives a clear check, decision or next step.
Readers may skim instead of reading each article linearly. Use headings that describe actions and keep paragraphs focused.
New topics can overlap with existing pages. Search similar words and compare the actual steps and audience.
A category can become too large to browse or too small to be useful. Use search for large groups and combine tiny groups with a shared reader task.
A page count can include the featured article, product pages or duplicates. State clearly what the count includes and calculate it from unique guide slugs.
An update note can be vague if it does not identify what changed. Summarize the meaningful correction or new information.
Readers may not know whether to search a product name or a problem. Suggest practical terms such as sleeve, slot, glare, shelf or cart.
Search results can be difficult to choose when all matches appear equally relevant. Prioritize title matches and show a short description beneath each link.
A page can slow down when it renders too many large images. Use a compact text directory and a small number of featured photos.
Sitemaps have per-file URL limits and need valid XML. Check unique canonical URLs and split into sitemap indexes if limits are approached.
A large slug list can create build or route errors. Validate unique slugs, image paths, static params and sitemap coverage.
A link may fail when opened directly even if in-site navigation works. Open the exact article URL in a new tab and refresh it.
Client navigation can mask a missing server route. Reload the article URL and confirm the same content is returned.
Schema can become invalid when content fields are missing. Check required properties and confirm values match visible article details.
A canonical can accidentally point to a staging or generic page. Check the rendered canonical uses the production domain and current slug.
A typo in a slug can create a dead end. Check that every directory link corresponds to a generated page.
A stale hard-coded count can disagree with the directory. Calculate the count from unique articles and include the featured page consistently.
Search can fail on accents, spaces or partial phrases. Try a title phrase, a category term and a no-result query.
Expandable categories can be awkward if summaries are too small. Check touch target spacing, text wrapping and horizontal overflow.
A large desktop view may spread the content too widely. Check reading width, topic grouping and search position.
Publishing a large update can change many URLs at once. Build, verify route counts, check sitemap and inspect sample articles.
A successful deployment does not guarantee every page rendered correctly. Open representative pages and check images, canonicals and navigation.
Feedback may identify a confusing or missing step. Reproduce the issue, update the relevant guide and verify the changed page.
A once-useful guide can become stale when products or user needs change. Review whether the article still answers a distinct question and points to live information.
Writing Alt Text for Card Display Photos when displaying a set: the group’s order, visual theme and amount of space available. choose a subset or sequence that leaves gaps and preserves each card’s visibility.
Making Card Display Guides Easier to Scan during a card rotation: a clean staging area, the replacement card and safe storage for the current one. prepare both cards before starting and complete one careful change at a time.
Writing Clear Holder Option Labels in a shared room: other people’s movement, shared surfaces and the chance of accidental contact. choose a stable defined area away from food, bags, doors and high-use surfaces.
Organizing Guides by Collector Question when photographing the setup: camera level, light reflection, full holder visibility and sample-card context. capture a level front view plus a side view and use soft indirect light.
Writing a Useful Card Display Summary when preparing a custom request: exact measurements, card orientation, support visibility and style preferences. separate must-have fit requirements from optional colour or decoration requests.
Looking for a display? Browse the made-to-order holder designs and check the fit details before choosing.